Master Travel Photography in 3 Months: US Landscapes Course
This comprehensive guide outlines a structured 3-month course designed to equip beginners with the essential skills and knowledge to capture stunning travel photographs of US landscapes, focusing on practical techniques, equipment understanding, and post-processing, thereby transforming amateur photographers into proficient visual storytellers.
Embarking on a journey to capture the breathtaking beauty of US landscapes through the lens of a camera can be deeply rewarding. This guide is your definitive starting point for understanding How to Master Travel Photography in 3 Months: A Beginner’s Course for Stunning US Landscapes, offering a structured approach to transform your raw passion into photographic prowess.
Understanding the Fundamentals: Your First Month of Mastery
The initial month of your travel photography course is dedicated to building a robust foundation. Just as an architect needs to understand basic physics and materials before designing a skyscraper, a beginner photographer must grasp the core principles that underpin every great shot. This phase is crucial for developing an intuitive understanding of your camera and the art of seeing.
We’ll begin by dissecting the crucial components of exposure: aperture, shutter speed, and ISO. These three elements form the “exposure triangle,” and mastering their interplay is fundamental. Understanding how each affects the final image—from depth of field to motion blur and grain—is not merely technical; it’s an artistic decision that shapes your photographic expression.
Demystifying Your Camera Settings
Many new photographers operate their cameras solely in automatic mode, which, while convenient, severely limits creative control. Our goal in month one is to transition you from automatic to manual or semi-automatic modes. This empowers you to make deliberate choices about how your photographs look.
- Aperture (f-stop): Learn how a larger aperture number (e.g., f/16) creates a vast depth of field, keeping an entire landscape in sharp focus, and how smaller numbers (e.g., f/2.8) isolate your subject with a blurred background.
- Shutter Speed: Explore how fast shutter speeds (e.g., 1/1000 sec) freeze action, perfect for wildlife or fast-moving water, while slower speeds (e.g., 2 sec) introduce motion blur, ideal for flowing rivers or star trails.
- ISO: Understand ISO’s role in light sensitivity. Low ISOs (e.g., 100) yield the cleanest images, but higher ISOs might be necessary in dim conditions, albeit with increased digital noise.
Understanding these settings not only improves your image quality but also expands your creative toolkit. You’ll begin to anticipate how changes in light and subject matter will influence your camera’s ideal settings, fostering a more proactive approach to photography.
Composition: The Art of Seeing
Beyond technical settings, composition is arguably the most vital element in travel photography. It’s about arranging elements within your frame to create a visually appealing and impactful image. Month one will introduce you to foundational compositional rules.
While rules are meant to be broken, understanding them first provides a solid framework. The rule of thirds, leading lines, framing, and symmetry are powerful tools that can transform an ordinary scene into a captivating photograph. We’ll delve into each of these, providing practical exercises to train your eye to spot opportunities for strong compositions in diverse US landscapes, from the grandeur of the Grand Canyon to the serene forests of the Pacific Northwest.
By the end of your first month, you should feel comfortable navigating your camera’s manual controls and consciously applying basic compositional techniques. This initial period is intensive but foundational, preparing you for more advanced concepts and practical application.
Advanced Techniques & Landscape Specifics: The Second Month
Having established a solid foundation in your first month, the second phase of this course delves into more specialized techniques essential for capturing the diverse and often challenging US landscapes. This month focuses on expanding your technical repertoire and adapting your skills to various natural environments, from towering mountains to sweeping deserts and dynamic coastlines.
Mastering Light: The Photographer’s Greatest Ally
Light is the essence of photography. Understanding how it behaves and how to utilize it effectively is paramount. This month, we will explore different types of natural light and their impact on your landscape shots. The “golden hour”—shortly after sunrise and before sunset—is renowned for its soft, warm, and highly flattering light, ideal for bringing out rich colors and textures in vast panoramas. Conversely, the “blue hour,” just before sunrise and after sunset, offers a cooler, ethereal quality suitable for moody and atmospheric scenes.
- Golden Hour Photography: Learn to identify the best angles and compositions during this magical time for warm, dramatic images.
- Blue Hour and Twilight: Explore techniques for capturing landscapes with subtle light, often involving longer exposures and the unique hues of dusk and dawn.
- Midday Challenges: Discover strategies to overcome the harsh, direct light of midday, such as using natural shade, looking for specular highlights, or embracing high-contrast scenes.
Beyond natural light, we’ll also touch upon the nuances of shooting in varying weather conditions. Overcast days, for instance, offer diffused light that reduces harsh shadows, while stormy skies can create incredibly dramatic backdrops. Adaptability to light is a hallmark of an expert travel photographer, and this month is dedicated to cultivating that skill.
Gear Deep Dive and Landscape-Specific Shots
While the first month focused on generic camera controls, month two is about optimizing your gear for specific landscape scenarios. This includes understanding lens choices, tripod usage, and essential accessories.
A wide-angle lens (e.g., 16-35mm) is often indispensable for sprawling landscapes, allowing you to capture expansive vistas. However, a telephoto lens (e.g., 70-200mm) can compress distant elements, creating a sense of scale and highlighting particular features like distant mountain peaks. We’ll also cover the importance of a sturdy tripod for sharp images, especially in low light or when using slower shutter speeds for effects like silky water.
Furthermore, we’ll dive into techniques for specific US landscapes:
Capturing the dynamic energy of waterfalls or coastal waves requires careful manipulation of shutter speed. For flowing water, a slower shutter speed (e.g., 1/2 to 2 seconds) smooths out the water, creating a dreamlike effect. Conversely, a faster shutter speed can capture the distinct spray of a crashing wave, freezing its power. Understanding filters, such as Neutral Density (ND) filters to prolong exposure in bright conditions, and Polarizing (CPL) filters to reduce glare and enhance colors, will be crucial here.
The vastness of deserts and the towering presence of mountains present unique challenges and opportunities. Emphasizing leading lines, employing golden hour light to accentuate textures, and utilizing foreground elements to add depth and scale are key. HDR (High Dynamic Range) techniques might be introduced to manage high contrast scenes, ensuring details in both bright skies and shadowy valleys are preserved.
By the end of this second month, you will not only be more adept with your camera but also more strategic in your approach to different landscape types, equipped with the knowledge to select and utilize the right gear and techniques for the shot you envision.
Post-Processing & Storytelling: The Third Month of Refinement
The final month of your intensive travel photography course shifts focus from capture to curation and enhancement. A stunning photograph is often the result of not just excellent shooting but also thoughtful post-processing. More importantly, this month emphasizes how to weave your individual photographs into compelling visual narratives, truly bringing your US landscape adventures to life.
Unleashing Potential with Post-Processing Software
Raw files, directly from your camera, contain a wealth of information but often appear flat and muted. Post-processing software is where you unlock their full potential, adjusting exposure, color balance, contrast, and sharpness to match your artistic vision. We will focus on two widely used platforms, Adobe Lightroom and Photoshop, demonstrating essential workflows that apply to most editing software.
- Lightroom for Organization and Basic Adjustments: Learn to import, organize, and perform fundamental enhancements like white balance corrections, exposure adjustments, shadow/highlight recovery, and color grading. This is where you bring your images closer to what your eye saw in the field.
- Photoshop for Precision and Creative Control: Delve into more advanced techniques such as cloning out distracting elements, dodging and burning for localized exposure control, and sophisticated layering for complex compositions or blends. This is where truly transformative edits can happen.
- Non-Destructive Editing: Emphasize the importance of working with non-destructive edits, allowing you to revisit and refine your work without permanently altering the original image data.
Understanding the ethical considerations of post-processing is also vital. The goal is to enhance reality, not to misrepresent it. We’ll discuss how to maintain photographic integrity while still creating impactful and visually striking images.
Crafting Visual Narratives: Beyond the Single Shot
A collection of beautiful photographs is good, but a series that tells a story is exceptional. This module is dedicated to the art of visual storytelling. Travel photography is fundamentally about sharing experiences, and a cohesive narrative elevates your work from a mere collection of images to a compelling journey for your audience.
Consider a trip through the national parks of the Southwest. Individual shots might capture the grandeur of a rock formation or the delicacy of a desert bloom. But a narrative might connect these, showing the progression of light throughout the day, the scale through human elements, or the diverse ecosystems encountered. We’ll discuss:
Sequencing involves arranging your photos in a logical and engaging order. Like chapters in a book, each image should flow into the next, building anticipation or providing context. This could be chronological, thematic, or based on visual rhythm, guiding the viewer through your experience.

Identifying the overarching theme of your travel experience helps group photos effectively. Are you focusing on the vastness of the American West, the intricate details of a specific ecosystem, or the human interaction with nature? A clear theme provides cohesion and helps you select images that contribute to a unified message.
Once you’ve curated your images and crafted your narrative, sharing it effectively is the final step. This includes understanding various platforms – from personal blogs and social media to print portfolios. We’ll touch upon image optimization for web, copyright basics, and strategies for presenting your work in a way that resonates with your audience.
By the end of month three, you’ll possess not only the technical prowess to capture stunning US landscapes but also the artistic sensibility to refine your work and present it as a compelling visual story. This complete journey transforms a beginner into a skilled travel photographer ready to showcase their unique perspective of the American natural world.
Essential Gear for US Landscape Photography
Selecting the right equipment is a critical step in your journey to master travel photography. While the camera body is important, the choice of lenses, a sturdy tripod, and several smaller accessories can significantly impact the quality and versatility of your landscape shots across the diverse terrains of the US. This section provides a practical guide to assembling your essential kit, balancing quality, portability, and budget.
Camera Bodies: DSLR vs. Mirrorless
Both DSLR and mirrorless camera systems offer excellent image quality, but they have distinct advantages. DSLRs tend to be more robust, have longer battery life, and offer a wide range of legacy lenses. Mirrorless cameras, on the other hand, are typically lighter, more compact, and feature advanced autofocus systems, particularly beneficial for capturing dynamic elements in landscapes like wildlife or moving water.
- Beginner-Friendly Options: For starters, models like the Canon Rebel series (DSLR) or Sony Alpha a6000 series (mirrorless) provide great entry points with manual controls and good image sensors without breaking the bank.
- Mid-Range Excellence: Cameras such as the Nikon D7500 (DSLR) or Fujifilm X-T30 (mirrorless) offer more advanced features, better low-light performance, and build quality suitable for more demanding travel.
- Full-Frame Advantages: If budget allows, full-frame cameras (e.g., Canon EOS R, Sony Alpha A7 III, Nikon Z6) deliver superior image quality, especially in low light, wider dynamic range, and often better control over depth of field, making them ideal for professional-level landscapes.
Ultimately, the best camera is the one you are most comfortable using consistently. Familiarity with your equipment is more valuable than having the most expensive gear.
Lenses: Your Eye on the Landscape
Lenses are arguably more important than the camera body itself as they dictate how you see and frame the world. For US landscape photography, a versatile set of lenses is key to capturing both vast expanses and intricate details.
The standard wide-angle zoom (e.g., 16-35mm or 10-24mm for crop sensors) is the cornerstone for landscapes, allowing you to include sweeping vistas. Look for lenses with a wide maximum aperture if you plan on astrophotography. A mid-range zoom (e.g., 24-70mm or 18-55mm kit lens) is incredibly versatile for general travel and can capture compelling compositions with a natural perspective. A telephoto zoom (e.g., 70-200mm or 55-250mm) is excellent for compressing scenes, isolating distant subjects like mountain peaks, or capturing wildlife. These lenses allow you to bring distant elements closer, creating unique perspectives not possible with wide-angle shots. They are also fantastic for capturing details in forests or isolating interesting rock formations.
When selecting lenses, consider their weight and size, especially if you plan on hiking long distances. Prime lenses (fixed focal length) often offer superior sharpness and larger apertures but sacrifice the flexibility of zooms.
Essential Accessories for the Field
Beyond the camera and lenses, several accessories are indispensable for serious landscape photography:
A sturdy tripod is vital for sharp images, especially in low light, for long exposures (e.g., silky waterfalls), or for panoramic stitching. Look for one that’s lightweight yet stable. Graduated Neutral Density (GND) filters help balance bright skies with darker foregrounds, preventing blown-out highlights or underexposed shadows. Circular Polarizing (CPL) filters reduce glare from water and foliage, and deepen blue skies, making colors pop. Extra batteries are non-negotiable, especially in cold weather or during extended shoots. A reliable backpack designed for camera gear ensures your equipment is protected and easily accessible. Lens cleaning kits, including a blower, brush, and microfiber cloths, are essential for keeping your optics pristine in dusty or wet environments. Finally, a portable hard drive or ample SD cards are crucial for backing up your precious shots while on the road.
Investing wisely in your gear ensures that you are prepared for almost any photographic opportunity the diverse US landscapes throw your way, empowering you to focus on composition and light rather than being limited by equipment.
Planning US Landscape Photo Excursions
Successful travel photography, particularly when focusing on the vast and varied US landscapes, requires meticulous planning. Spontaneity has its place, but a well-researched itinerary can significantly increase your chances of capturing stunning images. This section outlines key planning strategies, from researching locations to understanding environmental factors and local regulations.
Researching Locations: Finding Your Perfect Shot
The United States boasts an unparalleled array of natural beauty, from the canyons of Arizona to the coasts of Maine. Identifying the specific locations that align with your photographic vision is the first step. Online resources are invaluable for this phase.
- Google Maps & Satellite View: Excellent for scouting angles, understanding terrain, and identifying potential viewpoints before you even arrive. You can discover hidden trails or accessible overlooks.
- Photography-Specific Platforms: Websites like 500px, Flickr, and Instagram are goldmines for visual inspiration. Search hashtags or location tags to see what others have captured and consider what unique perspective you might offer. Pay attention to the lighting conditions in their photos.
- National Park Service Websites: For US national parks, these sites provide official maps, trail conditions, permits required, and often photography guidelines, which are crucial for responsible tourism.
Beyond visual research, immerse yourself in the natural history and geology of your chosen locations. Understanding how a landscape formed, its unique flora, or its specific wildlife can inspire more meaningful and informative photographs.
Seasonal Considerations and Time of Day
The time of year and even the specific hour of the day can dramatically alter the photographic potential of a landscape. Failing to account for these factors can lead to missed opportunities or sub-optimal results.
Winter in places like Yellowstone offers dramatic snowscapes and unique wildlife opportunities, but demands specialized gear and preparation for extreme cold. Spring in the Pacific Northwest means vibrant green forests and rushing waterfalls, but also unpredictable rain. Autumn in New England is legendary for its fall foliage, requiring advanced booking and patience with crowds. Summer in the Southwest US brings intense heat but also the possibility of dramatic monsoon thunderstorms, offering incredible light and cloud formations. Knowing what to expect allows you to tailor your gear and techniques accordingly.
Sunrise and sunset (the “golden hours”) consistently provide the most flattering light for landscape photography. Planning to be at your desired location with ample time before these windows is critical. Dedicated apps like PhotoPills or The Photographer’s Ephemeris can precisely predict sun and moon positions, allowing you to plan intricate shots involving celestial bodies or specific shadow play. Understanding how long these optimal light conditions last helps manage your time effectively, ensuring you capture multiple compositions.
Permits, Regulations, and Leave No Trace Principles
Many popular US landscapes, especially within national parks and wilderness areas, have regulations regarding photography, particularly for commercial use or larger groups. Even as a recreational photographer, it’s wise to be aware of rules:
Some areas might require special permits for tripods, drones, or even for certain off-trail access. Always check the official website of the park or land management agency beforehand. Regulations are in place to protect sensitive ecosystems and wildlife. Respecting these boundaries ensures you don’t inadvertently harm the environment or disturb animals.
Adhering to the “Leave No Trace” principles is paramount. This includes staying on marked trails, packing out everything you pack in, and respecting wildlife from a distance. As a photographer, your interaction with nature should be minimal, ensuring these pristine landscapes remain beautiful for future generations. Your responsibility extends beyond capturing an image; it includes preserving the subject itself. This responsible approach not only protects the environment but also enhances your experience and the authenticity of your photography.
Thorough planning ensures that your US landscape photography excursions are not just productive but also safe, respectful, and ultimately more rewarding, allowing you to focus on the creative act rather than logistical hurdles.
Storytelling with US Landscapes: Beyond the Postcard Shot
While capturing a technically perfect image of an iconic US landscape is commendable, true mastery in travel photography lies in the ability to tell a story. This goes beyond the mere “postcard shot” and delves into conveying the emotion, atmosphere, and unique character of a place. This section focuses on developing your narrative skills to make your US landscape photographs resonate deeply with viewers.
Finding Your Unique Perspective
In an age where millions visit and photograph famous landmarks, finding a unique perspective becomes crucial. This doesn’t necessarily mean discovering a never-before-seen angle, but rather injecting your personal voice and interpretation into the scene. Think about what drew you to this particular landscape. What feeling does it evoke? Is it awe-inspiring grandeur, peaceful solitude, or rugged wildness?
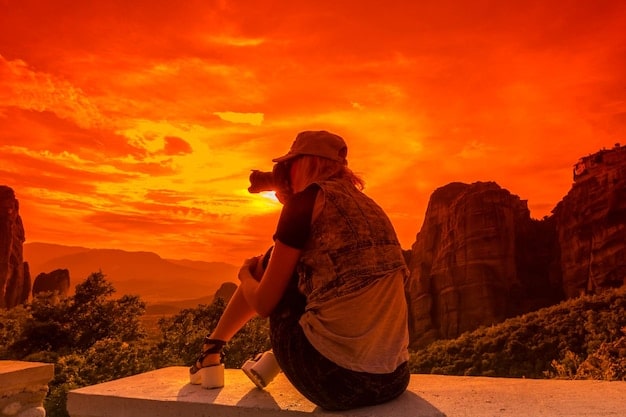
- Emotion and Mood: Instead of just documenting a scene, aim to capture its mood. A stormy sky above a mountain range speaks of power and raw nature, while a soft sunrise over a misty lake conveys tranquility. Use light, composition, and color to amplify these feelings.
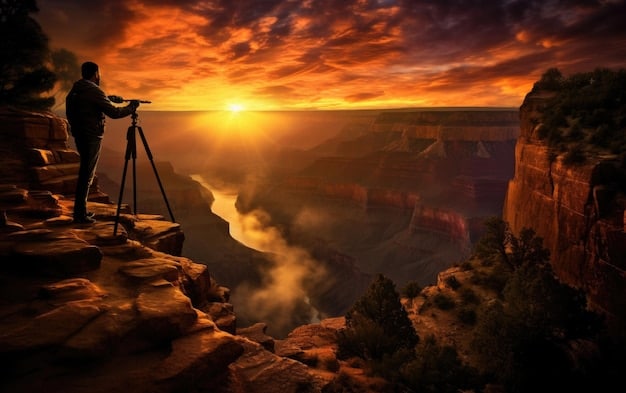
- Human Element (Optional but Powerful): Sometimes, including a human figure (even a small, silhouetted one) can provide a sense of scale and draw the viewer into the scene, allowing them to imagine themselves there. It connects the grandeur of nature with the human experience.
- Focus on Details: While wide shots are essential, don’t neglect the smaller, intimate details. A close-up of a unique rock texture, a desert flower, or the intricate pattern of tree bark can add depth and personality to your narrative. These details often go unnoticed but are vital components of a place’s identity.
Cultivating your personal vision involves slowing down, observing, and reflecting. Don’t just tick off a list of famous viewpoints; allow yourself to be immersed in the environment and let its story unfold before your lens.
Creating a Series, Not Just Single Shots
A single, powerful image can be memorable, but a series of interconnected photographs can weave a much richer narrative. When planning your US landscape excursions, think in terms of a photographic essay rather than individual trophy shots. This involves pre-visualizing how different images will contribute to a broader story.
Perhaps you’re exploring the diversity of climates within a single national park, from desert floor to alpine peak. Your series could showcase the dramatic changes in flora, fauna, and topography. Or, if you’re documenting a cross-country road trip, your narrative might follow the evolution of landscapes from east to west, highlighting cultural intersections with nature.
This approach requires intentionality in shot selection and sequencing. Consider how images transition from one another, creating a visual flow that engages the viewer from start to finish. Think about including establishing shots, medium shots, and close-ups to provide context, character, and detail. The goal is to transport your audience, making them feel like they’ve experienced the journey alongside you.
Ethical Storytelling and Authenticity
In travel photography, authenticity is paramount. While post-processing is a tool for enhancement, ensure your images remain true to the spirit of the place. Avoid excessive manipulation that distorts reality or creates a false sense of grandeur. The goal is to reveal the beauty that already exists, not to manufacture it.
Ethical considerations also extend to how you portray environments and communities. Respect local cultures, traditions, and the natural environment. Your photographs are a reflection of your interaction with the world; let them communicate respect and genuine appreciation. By focusing on telling an authentic story, you not only create more impactful photography but also foster a deeper connection with the landscapes you traverse.
Mastering storytelling in US landscape photography is an ongoing journey of observation, reflection, and technical skill. It transforms your role from a mere recorder of scenes to a thoughtful interpreter, capable of sharing the soul of a place with the world.
Bringing It All Together: Your Project Portfolio
The culmination of your three-month journey is the creation of a polished portfolio, demonstrating your newly acquired skills and unique photographic vision. This project is not just a collection of your best work; it’s a statement of your learning, your understanding of US landscapes, and your development as a travel photographer. This section guides you through curating, selecting, and presenting your final body of work.
Curating Your Best Work: Quality Over Quantity
After three months of shooting, you will likely have hundreds, if not thousands, of images. The first and most crucial step in building your portfolio is aggressive and discerning curation. The temptation to include every “good” shot can be strong, but a strong portfolio showcases your best, most cohesive work.
- Self-Critique: Be brutally honest with your own work. Which images truly stand out? Do they embody the technical skills you’ve learned (exposure, focus, sharpness)? Do they tell a compelling story or evoke an emotion? Seek feedback from trusted peers or mentors if possible, as an outside perspective can be invaluable.
- Technical Excellence: Prioritize images that are technically sound. Sharp focus where intended, appropriate exposure, and minimal noise are foundational. Even a beautiful scene can be undermined by poor technical execution.
- Storytelling & Impact: Select photos that contribute to a narrative or that individually have a strong emotional or visual impact. Avoid repetition; if two photos convey the same message, choose the stronger one.
Aim for a compact portfolio, typically 10-20 images, that represent the breadth of your skills and your unique artistic voice. Each image should be carefully selected and intentionally placed within the sequence.
Themed Collections and Visual Consistency
To further enhance your portfolio’s impact, consider organizing your selected images into themed collections rather than a random assortment. Given your focus on US landscapes, natural themes are a logical choice.
You might create a section dedicated to “Desert Vistas,” “Coastal Serenity,” or “Mountain Majesty.” Within each theme, ensure a visual consistency in terms of editing style, color palette, and overall mood. This doesn’t mean every photo should look identical, but rather that they complement each other, demonstrating a cohesive artistic vision. For example, a series on arid landscapes might feature warm, earthy tones and high contrast, while a forest series could be cooler, with softer light and a focus on greens and blues.
Presenting your images in a thoughtful sequence within these themes can create a more immersive experience for the viewer. Consider how one image transitions to the next, building a visual rhythm and guiding the audience through your exploration of the landscape.
Presenting Your Portfolio: Digital & Print Options
Once curated, your portfolio needs to be presented effectively. Depending on your goals, you might opt for a digital presence or a physical collection, or both.
A personal website or a dedicated portfolio platform (like SmugMug, Pixieset, or Adobe Portfolio) offers the most professional way to showcase your work online. Ensure that your images are optimized for web viewing (sized appropriately for fast loading, with good resolution for detail). Social media, while not a formal portfolio, can be a great way to share individual shots and direct traffic to your main site. For print, consider creating a small, high-quality photo book or individual prints of your absolute best work. Seeing your images in tangible form provides a different kind of satisfaction and demonstration of quality. When printing, pay attention to paper type and color calibration to ensure your prints accurately reflect your edited images.
Your finished portfolio is more than just a collection of pictures; it’s a testament to your hard work, your growth, and your ability to capture the soul of US landscapes. It’s a launchpad for future photographic adventures and a powerful tool for sharing your passion with the world.
| Key Aspect | Brief Description |
|---|---|
| 📸 Fundamentals | Mastering exposure triangle (aperture, shutter, ISO) and basic composition (rule of thirds, leading lines) in Month 1. |
| 💡 Advanced Techniques | Optimizing light, understanding specific gear (lenses, filters), and adapting for diverse US landscapes in Month 2. |
| ✨ Post-Processing & Story | Enhancing images with software and crafting compelling visual narratives in Month 3. |
| 🗺️ Planning Excursions | Researching locations, considering seasonality, and adhering to ethical photography principles. |
Frequently Asked Questions About Travel Photography
While a good camera body is important, a sturdy tripod is often considered the most crucial accessory for landscape photography. It ensures sharp images in low light, allows for long exposures, and facilitates precise composition, especially when using slower shutter speeds for effects like silky water.
Post-processing is extremely important. Raw camera files are often flat and require adjustments to exposure, contrast, color, and sharpness. It allows you to refine your images to match your artistic vision and unlock their full potential, transforming a good shot into an exceptional one, without misrepresenting reality.
Absolutely, with a structured and dedicated approach, a beginner can achieve a strong foundational understanding and practical skills in three months. While mastery is a lifelong journey, this course provides the essential knowledge and techniques to confidently capture stunning US landscapes and develop a unique photographic eye.
The “golden hours”—shortly after sunrise and before sunset—are generally considered the best times. The soft, warm, directional light provides beautiful colors, elongated shadows, and a flattering glow that enhances texture and depth in landscapes. The “blue hour” around twilight also offers unique, atmospheric opportunities.
To tell a story, move beyond mere documentation. Focus on capturing the mood and emotion of a place, consider including human elements for scale, and seek out intimate details that add character. Create a series of interconnected photos, rather than just single shots, to craft a more immersive and cohesive narrative.
Conclusion
Embarking on the journey of travel photography, particularly with an emphasis on the stunning US landscapes, is an immensely rewarding endeavor. This three-month immersive course lays a solid groundwork, transforming a beginner’s enthusiasm into a practiced skill. By diligently learning camera fundamentals, embracing advanced techniques, meticulously planning your excursions, and mastering the art of post-processing and storytelling, you are not just learning to take pictures; you are cultivating a keen eye, a discerning mind, and a unique voice to share your experiences. The landscapes of the United States are vast and varied, offering endless inspiration for those ready to capture their essence. This course provides you with the toolkit, the knowledge, and the confidence to not just photograph these wonders, but to translate their profound beauty into compelling visual narratives.


