Master Travel Photography in 3 Months: US Landscapes Course
Traveling the United States offers unparalleled photographic opportunities, and mastering travel photography in just three months is an achievable goal for aspiring beginners eager to capture stunning landscapes. This course provides a structured approach, blending foundational photographic principles with practical application, enabling participants to confidently document their journeys across diverse American environments.
Embarking on a journey to truly capture the soul of a destination through your lens is a rewarding endeavor. For those dreaming of immortalizing the breathtaking beauty of US landscapes, learning How to Master Travel Photography in 3 Months: A Beginner’s Course for Stunning US Landscapes offers an accessible and structured path. This guide will navigate you through essential techniques, gear considerations, and creative approaches to transform your travel snapshots into compelling visual stories.
Month 1: Building Your Foundation – Understanding the Basics
The initial month of this course focuses squarely on establishing a solid understanding of photographic fundamentals. Before you can break the rules, you must know them, and these basics are the bedrock upon which all advanced techniques are built. This initial phase involves conceptual learning coupled with hands-on practice, preparing you for the more complex aspects of landscape photography.
Understanding your camera settings, even on an advanced smartphone or a basic DSLR, is paramount. Many beginners often rely solely on automatic modes, which, while convenient, severely limit creative control. Delving into manual modes unlocks the potential to truly shape your images. We’ll explore the ‘exposure triangle’ as a critical concept during this month.
The Exposure Triangle: Aperture, Shutter Speed, and ISO
Mastering the exposure triangle is perhaps the most crucial step for any aspiring photographer. Each setting plays a vital role in how light is captured and presented in your final image. Learning to balance these three elements is key to achieving perfectly exposed and creatively composed photographs.
- Aperture (f-stop): Controls the depth of field and the amount of light entering the lens. A lower f-number (e.g., f/2.8) means a wider aperture, resulting in a shallower depth of field (blurry background) and more light. A higher f-number (e.g., f/16) means a narrower aperture, creating greater depth of field (everything in focus) and less light.
- Shutter Speed: Determines how long the camera’s shutter remains open, controlling the duration of light exposure. Fast shutter speeds (e.g., 1/1000 sec) freeze motion, ideal for capturing wildlife or fast-moving water. Slow shutter speeds (e.g., 1/30 sec or longer) create motion blur, perfect for silky waterfalls or light trails.
- ISO: Measures your camera’s sensitivity to light. A lower ISO (e.g., 100) produces cleaner images with less noise, ideal for bright conditions. A higher ISO (e.g., 1600+) increases sensitivity, useful in low-light situations, but can introduce digital noise or grain.
Practice adjusting these settings individually and observing their impact on your photos. Start by experimenting in controlled environments before moving to outdoor landscapes. Consider using a tripod when experimenting with slower shutter speeds to maintain sharpness, as camera shake can ruin an otherwise perfect shot.
By the end of this first month, you should feel comfortable manipulating your camera’s core settings to achieve desired exposures, understanding how each element contributes to the final aesthetic of your photographs. This foundational knowledge will serve you well as we progress into more advanced compositional and creative techniques.
Month 2: Composition and Light – Elevating Your Visual Storytelling
With a firm grasp of your camera’s foundational settings, month two shifts focus to the artistry of photography: composition and light. These elements are what truly differentiate a snapshot from a compelling photograph. Understanding how to arrange elements within your frame and harness natural light will transform your landscape images from good to outstanding, capturing the essence of US natural wonders with greater impact.
Composition is more than just placing your subject in the middle; it’s about guiding the viewer’s eye through the scene, creating balance, and telling a visual story. Light, on the other hand, is the very essence of photography. Learning to read and utilize different types of light will dramatically change the mood and complexity of your work. This month will involve practical exercises, encouraging you to analyze scenes before you even lift your camera.
Developing Your Eye: The Rules of Composition
While photography has “rules,” they are more accurately described as guidelines that have proven effective in creating visually pleasing images. Knowing when to apply them and, more importantly, when to break them, is a sign of a developing photographic eye. Start by internalizing these common compositional techniques:
- Rule of Thirds: Imagine your frame divided into nine equal sections by two horizontal and two vertical lines. Placing key elements along these lines or at their intersections creates more dynamic and engaging compositions than simply centering your subject.
- Leading Lines: Utilize natural or man-made lines (roads, rivers, fences, shadows) to draw the viewer’s eye through the frame, leading them to your main subject or deeper into the landscape.
- Framing: Use natural frames like archways, tree branches, or rock formations to enclose your subject, adding depth and drawing focus. This technique can add a sense of context and intimacy to your landscape shots.
- Symmetry and Patterns: Look for natural symmetry in reflections or repeating patterns in nature. These can create powerful and harmonious images, particularly in calm water reflections or geological formations.
Practice these concepts actively during your outings. Before taking a shot, pause and consider different angles, perspectives, and how various compositional rules could enhance the scene. Don’t be afraid to experiment, taking multiple photos of the same scene with different compositions.
Harnessing Natural Light: The Photographer’s Best Friend
Light dictates the mood, texture, and color in your photographs. Understanding how light changes throughout the day and how it interacts with the landscape is crucial for capturing stunning images. The “golden hour” and “blue hour” are particularly revered by landscape photographers for their magical qualities.
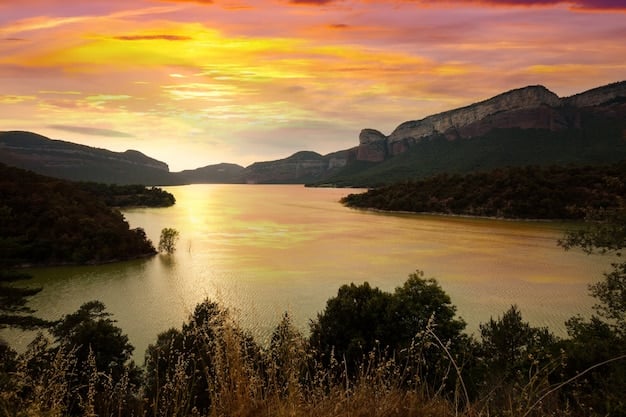
- Golden Hour: The period shortly after sunrise or before sunset, when the sun is low in the sky. It produces soft, warm, diffused light that casts long shadows, adding depth and richness to landscapes. This is often described as the most flattering light for almost any subject.
- Blue Hour: The period of twilight when the sun has dipped below the horizon but before it’s completely dark, roughly 20-30 minutes after sunset or before sunrise. The sky takes on a deep, rich blue hue, creating a cool, serene atmosphere perfect for cityscapes or landscapes with a more melancholic mood.
- Midday Light: While often challenging due to harsh contrasts and strong overhead shadows, midday light can be effectively managed with techniques like filling shadows with reflectors or using it to emphasize textures on bright, sunny days.
Spend time observing how light changes in different environments. Notice how it impacts shadows, highlights, and colors. This awareness will allow you to plan your shoots around the best lighting conditions, giving your travel photography an undeniable professional edge. By the end of this month, you’ll not only know how to take a technically good photo but also how to make it visually captivating.
Month 3: Advanced Techniques and Post-Processing – Unleashing Your Creative Vision
The final month of this intensive course builds upon the technical skills and compositional understanding acquired in the first two months. This is where you truly start to unleash your creative vision, moving beyond simply capturing what’s there to crafting images that evoke emotion and tell a story specific to your journey through the US landscapes. We’ll delve into more intricate photographic techniques and introduce the indispensable world of post-processing, which is where your raw images are refined into finished works of art.
This phase is about experimentation and developing a personal style. You’ll learn to push the boundaries of your camera and software, understanding that a great photograph often isn’t just taken but also made. Practical application will be key, as you’ll be encouraged to apply these new skills to a diverse range of mock or actual travel scenarios, preparing you for real-world photographic challenges.
Beyond the Single Shot: Panoramic and Long Exposure Photography
Sometimes a single frame isn’t enough to capture the grandeur of a landscape, or you might want to create a sense of movement and time. This is where specialized techniques like panoramas and long exposures come into play. They add a whole new dimension to your landscape photography, allowing you to convey the vastness or dynamic energy of a scene.
- Panoramic Stitching: Allows you to capture a broader field of view than a single lens can offer. By taking a series of overlapping photos and “stitching” them together using software, you can create breathtakingly wide landscape images that immerse the viewer in the scene. This is particularly useful for sweeping vistas and mountain ranges.
- Long Exposure Photography: Involves using a slow shutter speed (several seconds to several minutes) to create ethereal effects. Moving elements like water, clouds, or cars transform into smooth, silky blurs, while static elements remain sharp. This technique requires a sturdy tripod and often neutral density (ND) filters to reduce the amount of light entering the lens, especially during daylight.
These techniques require patience and careful attention to detail but offer incredibly rewarding results. Experiment with both during different times of day and in various landscape settings. For example, a long exposure of a waterfall in a national park can convey its power and flow beautifully, while a panoramic shot of the Grand Canyon captures its immense scale.
The Art of Post-Processing: Bringing Your Vision to Life
Raw images, straight out of the camera, are like unpolished gems. Post-processing is the polishing stage, where you enhance colors, adjust contrast, recover details, and correct imperfections. It’s an integral part of modern photography and can dramatically improve the final impact of your landscape photographs. Learning to use software like Adobe Lightroom or similar alternatives is essential.
Effective post-processing is about subtlety and enhancement, not distortion. Your goal should be to bring out the natural beauty of the scene as you experienced it, rather than creating an artificial image. Start with basic adjustments and gradually explore more advanced tools.
- Basic Adjustments: This includes correcting exposure, adjusting white balance for accurate colors, enhancing contrast, and making small tweaks to highlights and shadows. These initial steps alone can make a significant difference in the vibrancy and clarity of your images.
- Color Grading: Experiment with color saturation and vibrance to make your landscapes pop. Be mindful not to oversaturate, which can make images look artificial. Focus on enhancing natural hues.
- Sharpening and Noise Reduction: Apply sharpening to bring out fine details in your landscape elements while carefully using noise reduction to clean up any digital grain, especially in images taken at higher ISOs.
There are countless tutorials available online for various software. Set aside dedicated time each week to practice post-processing. Critique your own work, compare it to inspiring images, and incrementally refine your editing skills. This final month ensures you not only capture compelling landscapes but also present them in their best possible light, fully realizing your creative vision for stunning US scenery.
Essential Gear for the Aspiring Travel Photographer
While the focus of this course is heavily on technique and creative vision, having the right tools can certainly enhance your capabilities. You don’t need the most expensive equipment to start, but understanding what gear best suits your photographic goals is important. This section delves into the foundational equipment that will support your journey to master travel photography across US landscapes.
Choosing the right gear doesn’t mean buying everything on the market. It means making informed decisions about what will help you achieve your vision without becoming a burden on your travels. Prioritizing versatility and quality over quantity is a smart approach for travel photographers, especially when navigating diverse environments.
Camera Bodies and Lenses: Your Primary Tools
The core of your photographic kit will be your camera body and a selection of lenses. For beginners, a good entry-level DSLR or mirrorless camera offers a fantastic balance of control, image quality, and portability.
- Camera Body: Most modern DSLR or mirrorless cameras from reputable brands (Canon, Nikon, Sony, Fuji, etc.) are excellent starting points. Look for models that offer manual controls, good low-light performance, and a comfortable ergonomic design.
- Wide-Angle Lens: Essential for landscapes. A lens with a focal length of 16-35mm (on a full-frame sensor or equivalent on crop sensors) allows you to capture expansive vistas, towering mountains, and broad skies.
- Standard Zoom Lens: Often comes as a kit lens (e.g., 24-70mm or 18-55mm). This is a versatile option for general travel shots, portraits, and capturing scenes that don’t require an ultra-wide perspective.
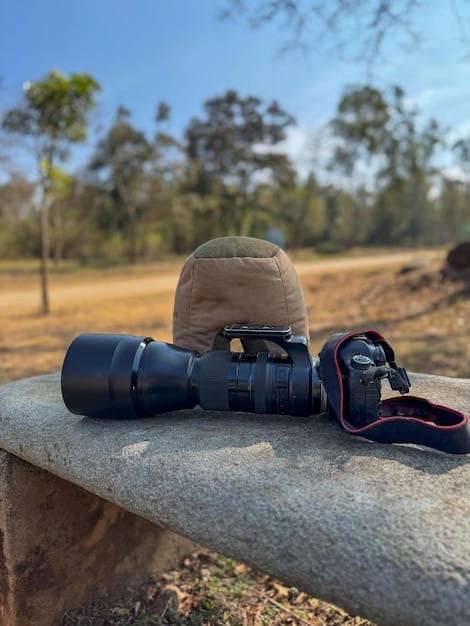
- Telephoto Zoom Lens: Useful for compressing perspective, isolating distant subjects like mountain peaks, or capturing wildlife. A 70-200mm or 70-300mm lens is a good choice for travel, offering significant reach.
Invest in good quality lenses as they often have a greater impact on image quality than the camera body itself. Consider renting lenses before buying to see what best fits your style and travel needs. This also allows you to experiment with different focal lengths without a large upfront investment.
Accessories That Make a Difference
Beyond the camera and lenses, a few key accessories can significantly enhance your travel photography experience and the quality of your images. These are not just “nice-to-haves” but can be crucial for specific photographic techniques.
- Tripod: Indispensable for landscape photography, especially for long exposures, low-light shooting, and ensuring sharp images when using slower shutter speeds. Look for a lightweight yet sturdy travel tripod.
- Filters (Polarizer, ND): A circular polarizer filter helps reduce glare from water and foliage, enhances blue skies, and increases contrast. Neutral Density (ND) filters reduce the amount of light entering the lens, allowing for longer exposures in bright conditions.
- Extra Batteries and Memory Cards: Running out of power or storage in a remote US landscape is a common and frustrating issue. Always carry spares.
- Camera Bag: A comfortable, weather-resistant camera bag that protects your gear and allows for easy access is vital for travel. Look for one that also accommodates personal items.
While the learning curve for new gear can be steep, familiarizing yourself with your equipment before your trip is vital. Practice changing lenses quickly, setting up your tripod, and using your filters so that when you’re faced with a stunning US vista, you can focus on composition and light, not struggling with your equipment. This preparation will ensure you’re always ready to capture the moment.
Planning Your US Landscape Photography Adventures
Successful travel photography, especially across the diverse and expansive landscapes of the United States, requires more than just technical skill and good gear; it demands careful planning. Understanding your destination, knowing the optimal times to shoot, and being prepared for various conditions can significantly impact the quality and uniqueness of your images. This section focuses on the strategic aspects of planning your photography expeditions.
The US boasts an incredible array of landscapes, from the snow-capped peaks of the Rockies to the red rock canyons of Utah, the lush forests of the Pacific Northwest, and the coastal beauty of California. Each environment presents its own photographic opportunities and challenges. Thoughtful preparation ensures you maximize your time and return with a portfolio worthy of these iconic locations.
Researching Destinations and Optimal Timing
Before you even pack your bags, dedicate time to thorough research. This involves understanding not just what to photograph but when and how to photograph it for the best results. A little homework goes a long way in increasing your chances of capturing stunning images.
- Location Scouting: Use online resources like Google Maps, Flickr, Instagram, and photography websites to scout potential shooting locations. Look for specific viewpoints, trail information, and examples of how other photographers have captured the area.
- Seasonal Considerations: Research the best time of year to visit particular landscapes. Fall foliage in New England, wildflowers in the desert spring, or frozen waterfalls in winter all offer unique photographic opportunities.
- Sunrise/Sunset Times: Critical for landscape photography. Use apps like PhotoPills or The Photographer’s Ephemeris to predict the exact times of sunrise, sunset, and the movement of light over your specific location. This allows you to plan your arrival and setup for the golden and blue hours.
- Weather Patterns: Keep an eye on weather forecasts. While clear skies are often desirable, dramatic clouds, fog, or even light rain can create unique and atmospheric scenes. Be prepared with appropriate gear protection.
Pre-visualizing your shots based on your research can help you arrive at your destination with a clear plan, reducing the time spent wandering and increasing the time spent capturing. This structured approach, combined with flexibility for unexpected opportunities, is the hallmark of an effective travel photographer.
Safety and Ethics in Landscape Photography
While capturing stunning images is important, your safety and adherence to ethical guidelines are paramount, especially when exploring the delicate ecosystems of US national parks and wilderness areas. Responsible photography means leaving no trace and respecting both nature and other visitors.
- Know the Rules: Always check the rules and regulations of national parks, state parks, and other natural areas. This includes restrictions on drones, off-trail hiking, and protecting flora and fauna.
- Stay on Designated Trails: This protects fragile ecosystems from damage and helps ensure your safety in unfamiliar terrain. “Leave No Trace” principles are crucial for preserving these natural wonders for future generations.
- Be Aware of Your Surroundings: Especially when focusing on your camera, it’s easy to lose awareness of uneven terrain, wildlife, or dangerous cliffs. Always prioritize your personal safety.
- Respect Wildlife: Maintain a safe distance from animals. Never disturb or feed wildlife for a photo opportunity. Use a telephoto lens if you want close-up shots.
By integrating safety and ethical considerations into your planning, you not only protect yourself and the environment but also set an example for responsible travel and photography. Your images will then carry the added weight of being captured with integrity and respect for the stunning US landscapes they depict.
Creative Approaches: Beyond the Postcard Shot
To truly master travel photography and capture the unique allure of US landscapes, it’s essential to move beyond simply documenting what’s in front of you. This means developing a creative eye that seeks out unique perspectives, incorporates storytelling elements, and imbues your images with personal interpretation. The aim is to create photographs that resonate with viewers and offer a fresh perspective on well-known locations, especially when traversing the diverse beauty of the United States.
Creative approaches involve intentional choices in composition, understanding the intangible elements of a scene, and sometimes, even breaking traditional “rules.” This section encourages you to think outside the box, experiment with different ideas, and develop a distinctive photographic voice that sets your work apart.
Finding Unique Perspectives and Compositions
Many iconic US landscapes have been photographed countless times. To make your images stand out, you need to find fresh ways to interpret these scenes. This often involves slowing down, observing, and actively seeking out details or angles that others might overlook.
- Look for Foregrounds: A strong foreground element can add depth and interest to your landscape shots, guiding the viewer’s eye into the scene. Look for rocks, flowers, interesting textures, or even subtle paths.
- Vary Your Height: Don’t always shoot from eye level. Get low to the ground to emphasize details or to create a sense of scale, or find higher vantage points to capture expansive panoramas.
- Explore Details: While wide shots are great for showcasing grandeur, don’t forget to zoom in on intricate details – the texture of a rock, the pattern of bark, or a unique plant. These close-ups can add intimacy to your visual narrative.
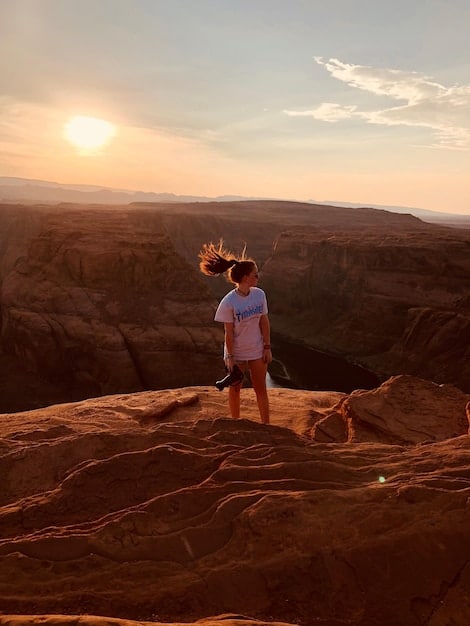
- Incorporate Humans or Wildlife: Adding a human element (a hiker, a small figure gazing at a view) can provide a sense of scale and connection. Similarly, respectfully incorporating local wildlife can bring life and narrative to your landscapes.
This pursuit of unique perspectives is an ongoing process of observation and experimentation. It’s about more than just finding a pretty spot; it’s about finding the story within that spot and positioning yourself to tell it most effectively. Challenge yourself to find at least three different compositions for every significant landscape you encounter.
Embracing Different Weather and Conditions
While many photographers hope for clear, sunny days, some of the most compelling landscape photographs are taken in less-than-perfect conditions. Fog, mist, storms, or even heavily overcast skies can create incredibly dramatic and atmospheric images that evoke strong emotions. Don’t let adverse weather deter you; embrace it as an opportunity.
- Fog and Mist: These conditions can transform a familiar landscape, simplifying elements and adding a sense of mystery and depth. They often soften light, creating a dreamy, ethereal quality.
- Stormy Skies: Dramatic clouds and moody lighting can add immense power and tension to your landscape photographs. Look for breaks in the clouds where sunlight might cut through, creating dynamic light beams.
- Overcast Days: While lacking direct sunlight, overcast conditions provide soft, diffused light, which is excellent for capturing rich colors in forests or detailed close-ups without harsh shadows.
- Rain and Snow: Rain can make colors more vibrant and create interesting reflections. Snow blankets landscapes in a serene white, transforming familiar scenes into magical winter wonderland. Just ensure your gear is adequately protected.
Being prepared for and actively seeking out these conditions can lead to truly distinctive photographs. Always prioritize safety, but also understand that some of the most memorable images come from venturing out when others might stay indoors. This willingness to adapt and experiment under various weather conditions will significantly expand your photographic repertoire and add depth to your visual storytelling of US landscapes.
Mastering the Narrative: Telling Stories with Your Images
Ultimately, travel photography isn’t just about capturing beautiful individual shots; it’s about weaving a visual narrative that transports your audience to the places you’ve experienced. For those learning to master travel photography across the diverse US landscapes, developing the ability to tell stories with your images is the capstone skill. This goes beyond technical proficiency and delves into the heart of what makes photography a powerful art form: its ability to communicate experiences and emotions.
A compelling visual story is often a collection of images that, when viewed together, convey a sense of place, a sequence of events, or a deeper meaning. It’s about showing, not just telling, the essence of your journey. This creative approach requires intentionality in every frame you capture, thinking about its role within a broader context.
Creating a Photo Series: From Wide Shots to Details
Instead of just one hero shot, think about creating a series of images that collectively describe a location or an experience. This involves varying your shots to provide a comprehensive look at your subject, much like a journalist crafts a feature article with different angles and layers of detail.
- The Establishing Shot: Start with a wide landscape shot that sets the scene, showing the grandeur and overall context of the location. This orients the viewer.
- Mid-Range Shots: Move in closer to capture specific features, landmarks, or interactions within the landscape. These shots add more detail and focus on key elements.
- Close-Ups and Details: Don’t overlook the small stuff. Capture textures, patterns, flora, fauna, or unique architectural elements that define the character of a place. These add intimacy and personal touch to your narrative.
- Human Element/Action Shots: If appropriate, include people interacting with the landscape. A hiker on a distant trail, a local resident, or an activity taking place can add life and a sense of scale to your story.
When you edit, select images that complement each other and work together to tell a complete story. Think about how they would flow if presented in an album, a blog post, or a photo essay. This holistic approach ensures your audience gains a richer understanding of your travels through the stunning landscapes of the US.
Developing Your Visual Voice and Personal Style
As you progress in your travel photography journey, you’ll naturally develop a unique visual voice. This is your personal signature – the way you see the world and translate it through your lens. It’s influenced by your aesthetic preferences, the topics you’re drawn to, and your editing style. Cultivating this voice is crucial for creating work that is truly original and impactful.
- Analyze Your Favorites: Look at your own body of work and identify patterns in composition, subject matter, and color palettes that you consistently gravitate towards. What emotions do your strongest images evoke?
- Learn from Others, But Don’t Imitate: Study the work of photographers you admire. Understand what makes their work effective, but then interpret those lessons through your own distinct perspective rather than simply copying their style.
- Experiment Constantly: Try new techniques, explore different editing styles, and visit various locations. Each experiment helps you discover what resonates most with you and what you’re passionate about capturing.
- Seek Feedback: Share your work with trusted peers or photography communities. Constructive criticism can offer fresh perspectives and help you identify areas for growth and refinement in your style.
Your visual voice will evolve over time, much like any skill. It’s a continuous journey of self-discovery and creative expression. By focusing on telling authentic stories and refining your unique perspective, you will not only master the technical aspects of travel photography but also create a compelling body of work that truly showcases the beauty and spirit of the US landscapes through your eyes.
| Key Aspect | Brief Description |
|---|---|
| 📸 Camera Fundamentals | Master the exposure triangle (aperture, shutter speed, ISO) to control light and depth in your photos. |
| 🖼️ Composition & Light | Utilize rules like thirds and leading lines, and harness golden/blue hour light for impactful scenes. |
| ✨ Advanced & Editing | Practice panoramas, long exposures, and essential post-processing for polished, creative results. |
| ✈️ Planning & Storytelling | Research destinations, plan for conditions, and craft visual narratives with diverse shots. |
Frequently Asked Questions About Travel Photography
The most crucial skill for a beginner travel photographer is mastering the exposure triangle: understanding the relationship between aperture, shutter speed, and ISO. This foundational knowledge allows you to control the light and depth of field, moving beyond automatic modes to create more intentional and visually appealing images, regardless of the camera used.
No, you do not need an expensive camera to start. Many modern smartphones offer excellent capabilities for beginners. An entry-level DSLR or mirrorless camera with manual controls is also a great starting point. Focus on understanding composition, light, and effective post-processing, as these skills are far more impactful than the cost of your equipment.
Post-processing is highly important in modern travel photography. It’s where you refine your raw images by adjusting exposure, contrast, color, and sharpness to bring out their full potential. While you capture the moment with your camera, subtle enhancements in software like Lightroom can significantly elevate the final aesthetic and impact of your landscape photographs.
The “golden hour” (shortly after sunrise or before sunset) and the “blue hour” (twilight) are generally considered the best times to photograph US landscapes. Golden hour provides soft, warm, diffused light that adds depth and richness, while blue hour offers a cool, serene atmosphere. Midday light can be challenging but can be used creatively to emphasize textures.
To make your travel photos stand out, focus on unique compositions, seek out different perspectives (e.g., low angles, details), and embrace varied weather conditions. Always look for strong foreground elements, include human interest to convey scale, and experiment with advanced techniques like long exposures. Developing a distinctive visual voice through thoughtful editing also helps.
Conclusion
In just three months, this beginner’s course provides a solid roadmap for aspiring photographers aiming to master travel photography and capture the awe-inspiring US landscapes. By systematically building foundational skills in camera operation, refining your eye for composition and light, exploring advanced techniques, and integrating effective post-processing, you will transition from merely taking pictures to crafting compelling visual stories. Remember, the journey to becoming a proficient travel photographer is continuous, filled with learning and discovery. Embrace every opportunity to practice, experiment with your creative vision, and allow the diverse beauty of the American outdoors to inspire your lens. Happy travels and happy shooting!


