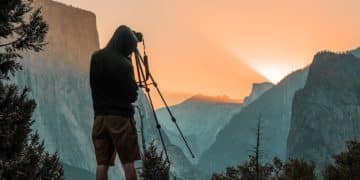
Master Travel Photography in 3 Months: US Landscapes Course
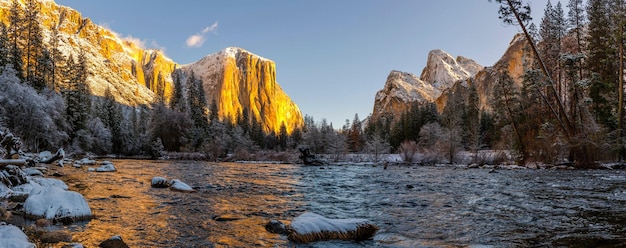
This beginner’s course outlines how to master travel photography in just three months, focusing on capturing stunning US landscapes through practical skills, essential gear, and creative techniques, ensuring rapid development for aspiring photographers.
Embarking on a journey to capture the breathtaking beauty of US landscapes can be incredibly rewarding, especially when equipped with the right photographic skills. This comprehensive guide, “How to Master Travel Photography in 3 Months: A Beginner’s Course for Stunning US Landscapes,” is designed for enthusiasts eager to transform their casual snapshots into compelling visual narratives. Over the next three months, we will delve into the fundamental principles, practical techniques, and essential gear necessary to elevate your travel photography, focusing specifically on the diverse and captivating scenery across the United States. Prepare to unlock your creative potential and document your adventures like never before.
Month 1: Building Your Foundation – Understanding the Basics
The first month of this intensive course is dedicated to solidifying your photographic foundation. Before you can capture stunning US landscapes, you need to understand the core elements that make a photograph great. This involves familiarizing yourself with your camera, understanding light, and mastering basic composition principles. Many beginners often overlook these fundamentals, rushing directly into advanced techniques, which often leads to frustration and inconsistent results. Our structured approach ensures you build a robust knowledge base.
Understanding your camera is paramount. Gone are the days of simply pointing and shooting if you aim for professional-level results. Modern cameras offer a plethora of settings that, when understood and utilized correctly, can dramatically improve your images. Aperture, shutter speed, and ISO form the “exposure triangle,” and mastering their interplay is the cornerstone of good photography.
Decoding Exposure: Aperture, Shutter Speed, and ISO
The exposure triangle dictates how much light reaches your camera’s sensor, directly impacting the brightness and overall appearance of your photograph. Each element plays a unique role, and adjusting one often requires compensating with another to achieve the desired exposure. Understanding these relationships allows for creative control beyond automatic settings.
- Aperture (f-stop): Controls the depth of field and the amount of light entering the lens. A wider aperture (smaller f-number) creates a shallow depth of field, blurring the background (ideal for isolating subjects), while a smaller aperture (larger f-number) keeps more of the scene in focus, which is perfect for landscapes.
- Shutter Speed: Determines how long the camera’s shutter remains open, affecting motion blur. A fast shutter speed freezes action (e.g., fast-moving water), while a slow shutter speed creates intentional blur, often used for silky water effects or light trails.
- ISO: Measures the sensor’s sensitivity to light. Lower ISOs (100-400) produce cleaner images with less noise, ideal in good lighting. Higher ISOs are necessary in low-light conditions but can introduce noticeable grain or digital noise.
Practicing these settings in various lighting conditions is crucial. Start by experimenting in your backyard or a local park before venturing into more complex US landscapes. The goal is to make these adjustments second nature, allowing you to react quickly to changing light and scenes.
Compositional Elements for Striking Landscapes
Composition is the art of arranging elements within your frame to create a visually appealing photograph. It guides the viewer’s eye and adds depth and interest to an otherwise ordinary scene. While rules exist, they are merely guidelines meant to be adapted and occasionally broken for creative effect. Developing a strong compositional eye starts with understanding these basic principles.
- Rule of Thirds: Divide your image into nine equal sections using two horizontal and two vertical lines. Placing key subjects along these lines or at their intersections can create a more balanced and engaging photograph than centering everything.
- Leading Lines: Utilize natural or artificial lines within the landscape (roads, rivers, fences) to draw the viewer’s eye into and through the image. This technique adds depth and a sense of journey.
- Framing: Use natural elements like branches, archways, or cliff edges to ‘frame’ your subject, adding context and a sense of looking into another world.
- Foreground Interest: Including an interesting element in the foreground can add depth and scale to a vast landscape, preventing it from looking flat.
As you progress through month one, actively seek out these compositional opportunities. Don’t just take a picture of a mountain; consider what’s in the foreground, how the light falls, and where the horizon lies. These considerations are fundamental for capturing truly stunning US landscapes.
By the end of your first month, you should feel comfortable navigating your camera’s manual settings and consciously applying basic compositional rules. This foundational knowledge will be your stepping stone for more advanced techniques and creative exploration in the months to come.
Month 2: Gear Up and Go – Essential Equipment and Practical Techniques
Having a solid foundation in photography is excellent, but to truly excel in travel photography, especially for diverse US landscapes, you’ll need the right tools and practical techniques. Month two focuses on understanding essential camera gear, utilizing various lenses, and mastering on-location shooting strategies. It’s about translating your theoretical knowledge into practical, stunning imagery.
When it comes to gear, it’s easy to get overwhelmed. The market is saturated with options, from beginner-friendly mirrorless cameras to professional DSLRs. However, focusing on essential items that offer versatility and durability is a smarter approach for travel photography. Remember, the best camera is the one you have with you, but a few key accessories can significantly enhance your results.
Beyond the Camera Body: Lenses and Accessories
While a good camera body is important, lenses are arguably more critical for shaping your photographic vision. Different lenses offer different perspectives and capabilities, making them indispensable for varied landscapes. A robust tripod, spare batteries, and effective filters also form the backbone of a successful landscape photographer’s kit.
- Wide-Angle Lens (16-35mm): Essential for capturing expansive US landscapes, grand mountain ranges, and architectural vistas. These lenses allow you to include more of the scene, creating a sense of immersion.
- Telephoto Lens (70-200mm): Useful for compressing perspective, isolating distant subjects, or capturing details within a vast scene, like a specific peak or a distant animal.
- Tripod: A non-negotiable item for sharp images, especially in low light, for long exposures (waterfalls, sunsets), or when using a slow shutter speed to achieve desired effects. Stability is key for landscape photography.
- Neutral Density (ND) Filters: These ‘sunglasses for your lens’ reduce the amount of light entering the camera, allowing for longer exposures in bright conditions. Perfect for creating silky smooth water or cloud effects.
- Polarizing Filter (CPL): Reduces glare from water or wet foliage, deepens blue skies, and enhances saturation, making colors pop without post-processing.
Investing in quality lenses and accessories will pay dividends in the long run. They not only enhance image quality but also expand your creative possibilities. Make sure to learn how to properly use and care for each piece of equipment, as they are crucial for capturing the diverse beauty of US landscapes.
Mastering Light and Golden Hour Photography
Light is the essence of photography. Understanding how light behaves and how to use it to your advantage is a defining characteristic of advanced photographers. For stunning landscapes, the ‘golden hour’ (shortly after sunrise and before sunset) is often considered the holy grail of lighting. This period offers soft, warm light that enhances colors and creates dramatic shadows.
Learning to scout locations beforehand, or using apps that predict sunrise/sunset times and directions, can significantly improve your chances of being in the right place at the right time. Don’t be afraid to wake up early or stay out late; the rewards are often worth the effort. Additionally, consider shooting during the ‘blue hour,’ the twilight periods just before sunrise or after sunset, which casts a unique, cool glow over the landscape.
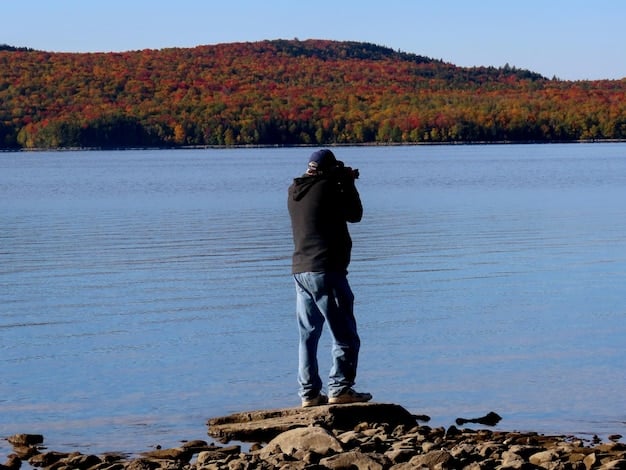
Field Techniques for Varied US Landscapes
The US offers an incredible variety of landscapes, from desert expanses and rocky mountains to lush forests and coastal vistas. Each environment presents its own photographic challenges and opportunities. Adapting your techniques to the specific landscape you’re in is vital.
- Mountains: Utilize leading lines from valleys or trails. Emphasize scale by including a person or a small object in the frame. Pay attention to atmospheric conditions like fog or clouds, which add drama.
- Deserts: Focus on patterns, textures, and the stark contrast of light and shadow, especially during golden hour. Look for unique rock formations, cacti, or sand dunes.
- Forests: Embrace soft, diffused light, especially on overcast days, which can enhance the lush greens. Experiment with compositions that highlight individual trees, moss, or streams.
- Coasts: Long exposures are excellent for smoothing out turbulent water and creating a serene feel. Incorporate interesting rock formations, driftwood, or dramatic skies.
This month is about hands-on experience. Get out there and shoot! Experiment with your new gear and put the compositional rules into practice in various US landscapes. By the end of month two, you should feel confident in your ability to choose the right gear and techniques for any natural setting, allowing you to capture the scenes you envision.
Month 3: Post-Processing and Portfolio Building – Polishing Your Masterpieces
You’ve spent two months building a strong technical foundation and gaining practical experience in the field. Now, in month three, it’s time to refine your images and present them effectively. This month focuses on the crucial steps of post-processing, developing your personal style, and curating a compelling portfolio that showcases your best work. Post-processing isn’t about altering reality; it’s about enhancing the captured image to match what you saw and felt at the moment of capture.
Modern digital photography workflow is incomplete without robust post-production. It’s where the raw data from your camera transforms into a polished, print-ready image. Understanding the tools and techniques available can dramatically improve the impact and artistry of your travel landscape photographs.
Introduction to Post-Processing Software
Several excellent software options are available for editing, with Adobe Lightroom and Photoshop being industry standards. For beginners, Lightroom often provides a more intuitive entry point, allowing for powerful adjustments without needing complex layering or selection tools immediately. However, knowing the capabilities of both is beneficial.
- Adobe Lightroom: Ideal for organizing, batch processing, and making global adjustments to your landscape images. Features like adjusting exposure, contrast, highlights, shadows, whites, blacks, clarity, vibrance, and saturation can profoundly impact your photos. It also offers excellent tools for non-destructive local adjustments.
- Adobe Photoshop: While more advanced, Photoshop is invaluable for complex tasks such as compositing, advanced retouching, precise local adjustments, and working with layers. It offers unparalleled control for fine-tuning specific elements of your landscape.
- Alternatives: Luminar AI, Capture One, and Affinity Photo are also powerful alternatives, each with its own strengths and learning curves. Explore demos to see which one resonates best with your workflow.
Start with basic adjustments and gradually explore more advanced features. Non-destructive editing is key, meaning your original image file remains untouched, and all edits are applied “virtually,” allowing for unlimited revisions. This approach preserves your original work while enabling creative experimentation.
Developing Your Unique Photographic Style
As you gain experience, you’ll naturally start to develop a photographic style—a consistent look and feel throughout your work that makes your images recognizable. This style is an amalgamation of your preferred compositions, lighting choices, and, significantly, your post-processing techniques. Don’t force it; let it evolve organically as you shoot more and experiment.
- Study Other Photographers: Analyze the work of landscape photographers you admire. What elements do they consistently incorporate? How do they use light and color? This isn’t about imitation, but about inspiration and identifying what appeals to you.
- Experiment Consistently: Try different angles, times of day, and processing styles. Don’t be afraid to deviate from the “rules” and see what happens. The more you experiment, the more you’ll understand your own preferences.
- Refine Your Editing Presets: Once you find a look that you love and want to replicate, create presets in Lightroom or styles in other software. This helps maintain consistency across your portfolio and speeds up your workflow.
Your style will continue to develop over your entire photographic journey, but month three is where you consciously start recognizing and nurturing it. This self-awareness is critical for building a distinct and memorable portfolio, especially when showcasing the unique beauty of US landscapes.
Building a Compelling Portfolio and Sharing Your Work
After three intensive months, you’ll have a significant collection of images. The final step is to select your best work and present it in a cohesive and visually appealing portfolio. A portfolio is not just a collection of photos; it’s a curated presentation that tells a story and showcases your skills and unique vision. Think of it as a gallery of your achievements.
- Quality over Quantity: Always choose your strongest images. One truly exceptional photograph is worth a dozen mediocre ones. Be ruthless in your selection process, and don’t be afraid to ask for honest feedback from others.
- Tell a Story: Organize your portfolio thematically or geographically. For example, a section on “Rocky Mountain Grandeur” or “Coastal Serenity” can add depth and context to your work.
- Online Presence: Create an online portfolio through platforms like SmugMug, Flickr, 500px, or a personal website. Social media (Instagram, Facebook) can also be powerful tools for sharing your work and connecting with other photographers and potential clients.
- Print Your Work: Seeing your images in print is a different experience. It allows you to appreciate the details and colors in a way that a screen cannot fully replicate. Consider printing a few of your favorites or creating a small photo book.
By the end of this month, you will not only have mastered the technical aspects of travel photography but also developed a unique artistic voice. Your portfolio will serve as a testament to your hard work and newfound skills, ready to share with the world, captivating audiences with the stunning US landscapes you’ve captured.
Advanced Techniques for Dramatic US Landscapes
As you move beyond the beginner stage, you’ll want to explore more advanced techniques to add dynamism and artistry to your landscape shots. These methods leverage your foundational knowledge and gear understanding to push the creative boundaries. Mastering them will allow you to capture scenes that truly stand out, from the subtle nuances of light to dramatic atmospheric effects.
One such technique is bracketed exposure, critical for high-contrast scenes. When photographing a bright sky and a dark foreground, it’s often impossible to capture detail in both with a single exposure. Bracketing means taking multiple shots at different exposures (e.g., one underexposed for the sky, one correctly exposed for the mid-tones, and one overexposed for the shadows) and then blending them in post-processing to create a single image with a wider dynamic range. This is particularly useful in diverse US landscapes where the contrast can be extreme.
Long Exposure Photography: Capturing Movement in Stills
Long exposure photography is a powerful tool for adding a sense of motion and ethereal quality to landscapes, especially those with water, clouds, or light trails. By leaving the camera’s shutter open for an extended period, moving elements blur into smooth, painterly effects.
- Smooth Water: Use ND filters to allow for shutter speeds of several seconds or even minutes, turning choppy rivers or crashing waves into a soft, misty expanse. This effect is particularly stunning at coastal areas or waterfalls across the US.
- Streaky Clouds: On windy days, long exposures can transform fast-moving clouds into dramatic streaks across the sky, adding dynamic interest to an otherwise static landscape.
- Light Trails: In urban landscapes or scenes with passing vehicles, long exposures can create mesmerizing light trails, adding a vibrant, energetic element to your night photography.
Achieving successful long exposures requires a sturdy tripod and often a remote shutter release to avoid camera shake. Experiment with different shutter speeds to find the desired level of blur and movement. This technique can transform ordinary scenes into extraordinary visual art.
Panorama Stitching: Expanding Your View
Sometimes, a single wide-angle shot isn’t enough to capture the grandeur of a vast US landscape, such as the expansive canyons or sweeping mountain ranges. Panorama stitching allows you to combine multiple overlapping images into a single, seamless wide-format photograph. This creates an ultra-wide field of view that truly conveys the immensity of the scene.
- Technique: Take several vertical photographs, slightly overlapping each one (about 20-30% overlap). Keep your camera level and rotate it on a fixed point, ideally using a panoramic head on a tripod. This reduces parallax errors.
- Post-Processing: Specialized software (like Lightroom, Photoshop, or dedicated panorama stitchers) can then automatically align and blend these images into a single, high-resolution panorama.
Panorama stitching offers an unparalleled way to capture the scale and scope of iconic US landscapes, providing a more immersive experience for the viewer. It’s a technique that adds significant “wow” factor to your portfolio if executed correctly, bringing vastness to life.
Storytelling Through US Landscape Photography
Photography is more than just capturing beautiful scenes; it’s about telling a story, evoking emotion, and sharing a unique perspective. For travel photography, this storytelling aspect is particularly potent. Each US landscape has a narrative, whether it’s the ancient history etched into a desert rock formation, the serene resilience of a redwood forest, or the vibrant energy of a coastal sunrise. Beyond technical prowess, a compelling photograph resonates because it speaks to the viewer on a deeper level.
Your ability to weave a narrative into your images elevates them from mere documentation to evocative art. This requires not just seeing what’s in front of you, but understanding the essence of the place and deciding what message you want to convey. It’s about capturing not just what a place looks like, but what it feels like.
Incorporating Human Elements and Sense of Scale
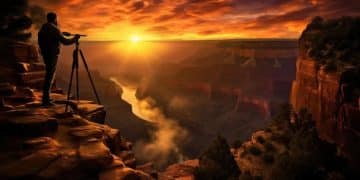
While often focused on pure nature, judiciously including human elements or structures can add a profound sense of scale and connection to US landscapes. A lone hiker on a vast trail, a small tent nestled against a monumental mountain, or an ancient bridge spanning a powerful river can provide perspective and make the scene more relatable.
- Scale: A person or a recognizable object instantly grounds the viewer, allowing them to comprehend the immense size of natural wonders like the Grand Canyon or Yosemite’s El Capitan.
- Emotion: A human figure can inject a narrative, suggesting exploration, solitude, wonder, or resilience. This encourages the viewer to imagine themselves within the scene.
- Rarity: Use human elements sparingly. Their impact is greatest when they are a small, complementary part of the larger scene, not the dominant subject unless specifically intended.
Consider the placement and size of these elements carefully to ensure they enhance, rather than detract from, the natural beauty of the landscape. They can turn a beautiful scene into a captivating story, inviting viewers to ponder the human relationship with nature.
Capturing the Essence of a Place: Beyond the Postcard Shot
While iconic landmarks are popular, true storytelling through photography often involves delving deeper than the typical postcard view. It’s about finding the less-obvious details, the unique light, or the fleeting moments that truly define a location. This takes patience, observation, and a willingness to explore beyond the tourist trail.
- Focus on Details: Don’t just photograph the entire panorama. Zoom in on interesting textures of rock, unique plant life, patterns in sand dunes, or the intricate details of a waterfall. These macro details can tell a powerful story about the environment.
- Embrace Different Conditions: Rain, fog, snow, or even harsh midday sun can offer unique photographic opportunities. These conditions create different moods and reveal aspects of a landscape that are often overlooked in ideal weather.
- Engage Your Senses: Before you even lift your camera, take a moment to absorb the sounds, smells, and feelings of the place. How can you translate these sensory experiences into a visual story? For example, the mist off a waterfall might suggest coolness, while a sun-baked desert rock signifies heat and endurance.
By intentionally seeking out these narratives, you begin to move beyond simply documenting places and start creating photographic essays that speak volumes. Your photographs of US landscapes will then not only be aesthetically pleasing but also imbued with a deeper meaning and personal connection.
Ethical Photography and Conservation in US Landscapes
As photographers exploring the magnificent US landscapes, we bear a significant responsibility, not just to capture beauty, but also to protect it. Ethical photography and conservation practices are paramount for ensuring these natural wonders remain unspoiled for future generations. Our actions in the field can have a direct impact on the environment, wildlife, and the experience of other visitors. Therefore, understanding and adhering to a set of ethical guidelines is crucial for any responsible travel photographer.
The allure of capturing a unique shot can sometimes tempt photographers to bend rules or encroach on sensitive areas. However, the long-term damage caused by such actions far outweighs any temporary photographic gain. Our goal should always be to leave no trace, respect nature, and promote conservation through our work, rather than compromise it.
Leave No Trace Principles: Minimizing Your Impact
The “Leave No Trace” principles are a set of widely accepted guidelines designed to help people enjoy the outdoors responsibly. Implementing these principles in your photography practice is not just good etiquette; it’s essential for preserving the integrity of US landscapes.
- Plan Ahead and Prepare: Know the regulations of the area you’re visiting. Pack appropriate gear, and understand the potential hazards. This includes knowing where you are allowed to be and when, especially in protected areas.
- Travel and Camp on Durable Surfaces: Stick to established trails and campsites. Avoid trampling vegetation, especially in fragile ecosystems.
- Dispose of Waste Properly: Pack out everything you pack in, including food scraps. Even biodegradable items can take a long time to decompose and can attract wildlife.
- Leave What You Find: Do not disturb historical sites, cultural artifacts, plants, or rocks. Take only photographs, leave only footprints.
- Minimize Campfire Impacts: Use established fire rings or portable stoves. Ensure fires are completely out before leaving.
- Respect Wildlife: Keep a safe distance from animals and never feed them. Use a telephoto lens to capture wildlife without disturbing their natural behavior.
- Be Considerate of Other Visitors: Respect solitude and quiet. Yield to others on trails and avoid being disruptive.
These principles are not suggestions but critical practices for anyone enjoying the outdoors, and especially for photographers who might spend extended periods in sensitive areas. Your photos carry more weight when they also represent responsible interaction with nature.
Protecting Wildlife and Sensitive Ecosystems
Many stunning US landscapes are home to diverse and often vulnerable wildlife and ecosystems. As photographers, we have a unique opportunity to highlight these natural treasures, but we must do so without causing harm. Disturbing wildlife for a photo, or entering restricted areas to get a better angle, is unethical and often illegal.
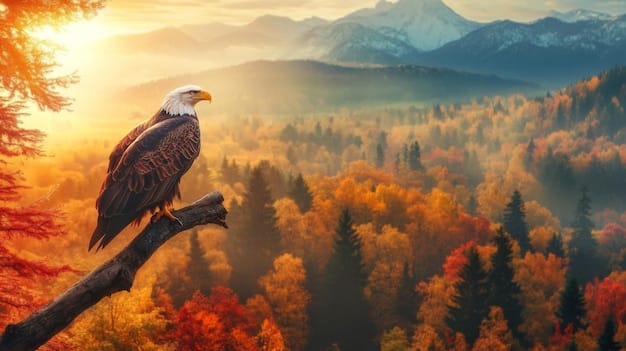
- Maintain Distance: Always use long lenses to photograph wildlife from a safe and respectful distance. Never approach animals, especially during mating, nesting, or feeding seasons.
- No Baiting: Never bait or harass animals to get a shot. This can alter their natural behavior and make them dependent on humans.
- Stay on Designated Paths: Many sensitive ecosystems, like deserts or alpine meadows, have fragile microbiomes that can be easily damaged by off-trail excursions.
- Research Before You Go: Understand the local flora and fauna and any specific regulations regarding their protection.
By prioritizing the well-being of the environment above the pursuit of a perfect photo, we contribute to the long-term health of the landscapes we cherish. Moreover, ethical photography practices lend credibility and authenticity to your work, strengthening your voice as a conservation advocate. Capturing stunning US landscapes goes hand-in-hand with preserving them.
The Journey Continues: Lifelong Learning in Photography
Completing this three-month course marks a significant milestone in your photographic journey, but truly mastering travel photography, especially in the vast and varied tapestry of US landscapes, is a lifelong endeavor. The world of photography is constantly evolving, with new technologies, techniques, and artistic trends emerging regularly. Your commitment to continuous learning will define your growth as a photographer, keeping your passion alive and your skills sharp. Think of this course not as an endpoint, but as a powerful springboard into an exciting, creative future.
The beauty of photography lies in its endless possibilities for exploration and expression. Every new location, every change in light, and every seasonal shift brings fresh opportunities to see the world differently. Embrace this perpetual learning curve as a fundamental part of your artistic process, allowing it to continually inspire and challenge you.
Staying Inspired and Experimenting
Inspiration is the fuel for creativity. To avoid plateaus and keep your vision fresh, actively seek out new sources of inspiration and consistently experiment with your craft. This iterative process of learning, trying, and refining is crucial for ongoing development.
- Explore New Genres: While your primary focus might be landscapes, briefly exploring other photography genres (e.g., portraiture, macro, street photography) can introduce you to new compositional ideas, lighting techniques, or post-processing styles that can then be applied to your landscape work.
- Attend Workshops and Read Books: There’s always more to learn from experienced professionals. Workshops offer hands-on guidance and networking opportunities, while books provide in-depth knowledge and artistic perspectives.
- Join Photography Communities: Engage with online forums, local photo clubs, or social media groups. Sharing your work, receiving constructive criticism, and seeing the work of others can be incredibly motivating and insightful.
- Revisit Locations: Photographing the same US landscapes at different times of day, in different seasons, or under varying weather conditions can reveal entirely new dimensions and challenge your creative eye.
Don’t be afraid to try new things, even if they initially seem to be outside your comfort zone. Often, breakthroughs happen when you push boundaries and question established norms. This openness to experimentation will drive your unique artistic expression forward.
Embracing New Technology and Techniques
The photographic landscape is dynamic, with technological advancements continually reshaping what’s possible. From new camera bodies and lenses to innovative software and drone technology, staying abreast of these developments can open up exciting creative avenues for capturing US landscapes.
- Keep Up with Gear Reviews: Understand what new cameras and lenses offer. While you don’t need to acquire every new piece of equipment, knowing what’s available helps you make informed decisions when upgrading or expanding your kit.
- Master New Software Features: Post-processing software constantly updates with new tools and AI-powered enhancements. Dedicate time to learning these new functionalities to streamline your workflow and enhance your images.
- Explore Drones: For landscape photography, drones offer unparalleled aerial perspectives that can dramatically transform your ability to capture the vastness and patterns of US landscapes, providing a bird’s-eye view previously unattainable. Always adhere to drone regulations and safety guidelines.
Technological mastery should always serve your artistic vision, not dictate it. Use new tools to tell your stories more effectively and to capture the beauty of the world in ways that were previously impossible. Your journey to master travel photography for stunning US landscapes is an ongoing adventure, rich with opportunities for growth and discovery.
| Key Aspect | Brief Description |
|---|---|
| 📸 Camera Fundamentals | Mastering Aperture, Shutter Speed, and ISO in Month 1 for proper exposure and creative control. |
| 🎒 Essential Gear | Selecting the right lenses, tripod, and filters in Month 2 for diverse US landscapes. |
| ✨ Post-Processing & Style | Refining images and developing a unique photographic style in Month 3 with software. |
| 🏞️ Ethical Practices | Upholding Leave No Trace principles and respecting wildlife to preserve natural beauty. |
Frequently Asked Questions About Travel Photography
The most crucial skill for a beginner travel photographer is understanding the exposure triangle (aperture, shutter speed, ISO). Mastering how these three elements interact gives you creative control over your images, allowing you to adapt to different lighting conditions and achieve your desired artistic vision for stunning US landscapes.
While professional gear can offer advantages, you absolutely do not need expensive equipment to start. A basic interchangeable lens camera, a versatile lens, and a sturdy tripod are more than sufficient. Focus on mastering techniques and composition; these are far more impactful than the latest camera body when capturing beautiful US landscapes.
Post-processing is extremely important in modern landscape photography. It allows you to refine your images, correct imperfections, enhance colors, and bring out details that were captured in the raw file. It’s not about fabricating reality, but about translating the scene as you experienced it and making your US landscape photos truly shine.
The “golden hour” (shortly after sunrise and before sunset) offers the most beautiful light for US landscapes. This soft, warm, directional light enhances textures and colors. The “blue hour,” just before sunrise or after sunset, also offers unique, cool tones and dramatic skies, providing ample opportunities for captivating images.
Developing a unique style comes from consistent practice, experimentation, and critical self-reflection. Study photographers you admire, experiment with different compositional approaches and editing techniques, and choose what resonates most with you. Your style will organically evolve as you continue to photograph and refine your creative vision for US landscapes.
Conclusion: Your Photographic Journey Begins Now
The journey to mastering travel photography within three months, with a specific focus on the enchanting US landscapes, is an ambitious yet entirely achievable goal. Through dedicated practice, a solid understanding of photographic fundamentals, strategic gear selection, and meticulous post-processing, you have laid the groundwork for a truly rewarding artistic pursuit. Remember that photography is a blend of technical skill, creative vision, and a deep appreciation for your subject. The United States offers an unparalleled canvas for your lens, from the serene coastlines to the majestic mountain ranges and the vast, echoing deserts. Embrace every challenge as an opportunity to learn, every sunrise as a chance to capture something extraordinary, and every click of the shutter as a step further in your unique photographic story. Your ability to create stunning visual narratives is now within reach; go forth and explore, one breathtaking landscape at a time.
