Master Travel Photography in 3 Months: Stunning US Landscapes
Mastering travel photography within three months, focusing on capturing stunning US landscapes, involves a structured approach encompassing fundamental camera skills, compositional techniques, and post-processing, culminating in a confident ability to document America’s natural beauty vividly and effectively for beginners.
Embarking on a journey to master How to Master Travel Photography in 3 Months: A Beginner’s Course for Stunning US Landscapes is an exciting endeavor. This guide is crafted to transform aspiring photographers into skilled visual storytellers, ready to capture the breathtaking beauty of the United States. Through a focused, three-month curriculum, you will learn the essential techniques and creative approaches to produce truly stunning landscape images.
The Foundations: Understanding Your Gear and Basic Principles (Month 1)
The first month of your journey into travel photography is dedicated to building a solid foundation. This is where you move beyond auto mode and start understanding the mechanical and artistic principles that govern great landscape photography. Mastering your camera settings and basic compositional rules will significantly elevate your early attempts.
Many beginners often feel overwhelmed by the myriad of buttons and functions on their cameras. However, breaking down these complexities into manageable steps makes the learning process far more approachable. We’ll start with the exposure triangle—aperture, shutter speed, and ISO—which are the three pillars of proper exposure.
Demystifying the Exposure Triangle
Understanding how aperture, shutter speed, and ISO interact is crucial for taking control of your camera. Each setting offers creative control over different aspects of your image, from depth of field to motion blur.
- Aperture (f-stop): Controls the depth of field (how much of your image is in focus). For landscapes, a higher f-number (e.g., f/11, f/16) typically keeps more of the scene sharp, from foreground to background.
- Shutter Speed: Determines how long the camera’s sensor is exposed to light. Fast shutter speeds (e.g., 1/500s) freeze motion, while slow speeds (e.g., 1/2s, 30s) can create artistic blur in water or clouds, especially useful for dramatic waterfall or coastal shots.
- ISO: Measures the camera’s sensitivity to light. Keep ISO as low as possible (e.g., 100 or 200) for cleaner, less noisy images, especially in well-lit outdoor scenes. Increase it only when necessary in low-light conditions.
Practicing with these settings in different outdoor environments, even just in your backyard, will build muscle memory and intuitive understanding. Aim to spend time each week experimenting with various combinations to see how they impact your final image.
Essential Gear for Landscape Photography
You don’t need the most expensive gear to start, but having the right tools makes a difference. A reliable camera body, a versatile lens, and sturdy support are paramount for capturing the beauty of US landscapes.
- Camera Body: A good DSLR or mirrorless camera offers manual controls and interchangeable lenses. Entry-level models are perfectly capable for beginners.
- Lenses: A wide-angle lens (e.g., 16-35mm or 10-24mm on APS-C) is often preferred for landscapes to capture expansive views. A mid-range zoom (e.g., 24-70mm) is also useful for more versatility.
- Tripod: Indispensable for sharp images, especially in low light or when using slow shutter speeds. Invest in a sturdy, lightweight model suitable for travel.
- Filters: Polarizing filters (to reduce glare and enhance colors) and Neutral Density (ND) filters (to allow for longer exposures in bright light) are highly recommended.
Understanding and applying these foundational elements will set you on a clear path towards confident photography. By the end of this first month, you should feel comfortable operating your camera in manual mode and making informed decisions about exposure.
Composition and Light: Seeing Like a Photographer (Month 2)
With a firm grasp of your camera’s technical aspects, the second month shifts focus to the artistic side of photography: composition and light. These elements are what truly differentiate a snapshot from a stunning photograph, especially when capturing the vastness of US landscapes. Learning to “see” photographically involves training your eye to identify compelling arrangements and optimal lighting conditions.
Composition is essentially how you arrange elements within your frame to create a visually appealing image. It’s about guiding the viewer’s eye and telling a coherent story. Light, on the other hand, is the very essence of photography and dramatically influences the mood and quality of your landscape shots.
Mastering Compositional Rules and Guidelines
While rules are meant to be broken, understanding them first gives you a powerful toolkit. For beginners, applying these consistently will elevate your images substantially.
- Rule of Thirds: Divide your image into nine equal sections with two horizontal and two vertical lines. Place points of interest at the intersections or along these lines, rather than dead center, for a more dynamic composition.
- Leading Lines: Use natural or man-made lines (roads, rivers, fences, pathways) to draw the viewer’s eye into and through the photograph, creating depth and a sense of journey.
- Framing: Utilize natural elements like tree branches, archways, or rock formations to frame your subject, adding context and depth to the scene.
- Foreground Interest: Including an interesting element in the foreground helps create depth and draws the viewer into the scene, especially in expansive landscapes.
- Symmetry and Patterns: Look for natural symmetry in reflections or abstract patterns in rock formations or sand dunes to create visually striking images.
Practice these rules consciously. When you’re out shooting, take a moment to analyze the scene and identify how you can apply one or more of these techniques. Over time, they will become second nature.
Understanding and Utilizing Natural Light
Light is paramount in landscape photography. The time of day, weather conditions, and direction of light can completely transform a scene. Recognizing and leveraging optimal lighting is a hallmark of an experienced landscape photographer.
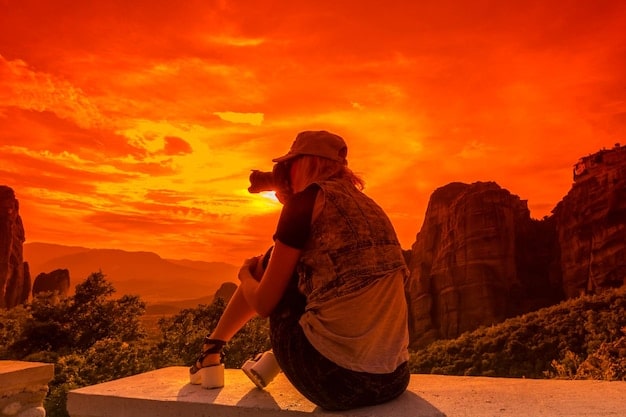
- Golden Hour: The period shortly after sunrise or before sunset. The light is soft, warm, and creates long, flattering shadows, adding depth and dimension. This is often the best time for landscape photography.
- Blue Hour: The period just before sunrise or after sunset, when the sky takes on a deep blue hue. This provides a cool, moody light perfect for capturing cityscapes or landscapes with a more serene feel.
- Midday Sun: Often harsh and unflattering, creating strong contrasts and blown-out highlights. However, it can work for certain styles, especially with strong, graphic compositions or when deliberately shooting into the sun for halo effects.
- Overcast Skies: Act as a giant softbox, providing even, diffused light that’s excellent for shooting forests, waterfalls, and close-up details without harsh shadows.
Pay attention to the direction of light. Front-lighting can make a scene look flat, while side-lighting emphasizes texture and form. Back-lighting can create dramatic silhouettes or beautiful lens flares if controlled well. By understanding how light interacts with the landscape, you can predict and plan your shots, ensuring you’re at the right place at the right time.
Post-Processing and Storytelling: Refining Your Vision (Month 3)
The final month is dedicated to bringing your images to life through post-processing and developing your unique photographic voice. Post-processing is not about creating something that wasn’t there, but rather enhancing what you captured, addressing technical imperfections, and reflecting your artistic vision. This stage is crucial for mastering travel photography, allowing you to elevate raw captures into stunning visual narratives.
Many beginners shy away from post-processing, viewing it as complex or unnecessary. However, even professional photographers spend significant time editing. It’s an integral part of the creative process, much like developing film in a darkroom. It provides the flexibility to correct common issues, recover details, and fine-tune colors to match the emotion you felt at the moment of capture.
Essential Post-Processing Techniques for Landscapes
Software like Adobe Lightroom and Photoshop are industry standards, but there are many free or less expensive alternatives available. The principles remain the same regardless of the tool.
- Exposure Adjustment: Correcting overall brightness and contrast. Often, landscape images benefit from slight adjustments here to bring out detail in shadows and highlights.
- White Balance Correction: Ensuring colors are accurate and natural. This is especially important when light conditions vary (e.g., blue hour vs. golden hour).
- Cropping and Straightening: Refining composition and correcting tilted horizons. A slightly off horizon can distract from an otherwise perfect shot.
- Highlight & Shadow Recovery: Pulling detail back from overexposed skies or underexposed foregrounds, common challenges in high-contrast landscape scenes.
- Color Grading: Enhancing the vibrancy and mood of colors without making them look artificial. This can involve adjusting saturation, vibrance, and individual color channels.
- Sharpening and Noise Reduction: Fine-tuning image clarity and reducing undesirable grain, especially in images taken at higher ISOs.
Start with subtle adjustments. The goal is to enhance, not to drastically alter. There are countless tutorials online for specific software that can guide you through these steps gradually. Dedicate regular time to practice editing your favorite shots.
Developing Your Photographic Voice and Storytelling
Beyond technical skills, the most compelling travel photographs tell a story and reflect the photographer’s unique perspective. This is where your journey goes beyond mere documentation to artistic expression.
- Reflect on Your Experience: What feelings did the landscape evoke? What message do you want to convey? Your emotions can guide your editing choices and selection of images.
- Curate Your Best Work: Not every photo needs to be shared. Learn to be selective and present only your strongest images that fulfill your narrative. Quality over quantity is key.
- Sequence Your Images: If presenting a series, consider how images flow together to tell a broader story of your travel experience. This might involve grouping photos by location, time of day, or theme.
- Seek Feedback: Share your work with trusted friends or online communities. Constructive criticism is invaluable for growth and refining your vision.
By the end of this month, you won’t just be taking pictures; you’ll be creating visual stories. You will have a refined workflow from capture to edit, capable of producing stunning and impactful landscape photography from your US travels.
Exploring Iconic US Landscapes: Practical Application
Now that you’ve built your theoretical knowledge and skills, it’s time to apply them to the spectacular canvases of the United States. The diversity of US landscapes offers endless opportunities for every type of photographer. From the dramatic peaks of the Rockies to the serene coastlines of California, each location presents unique challenges and rewards. Understanding some of the most iconic landscapes and how to approach them photographically will significantly boost your confidence and yield impressive results.
Successful landscape photography isn’t just about showing up with a camera; it’s about preparation, understanding the environment, and knowing what compositional elements to prioritize. Each type of landscape—mountains, deserts, forests, coasts—requires a slightly different photographic strategy. Tailoring your approach will ensure you capture the essence of each unique location beautifully.
Capturing the Grandeur of Mountains and Deserts
The vastness of mountain ranges and the stark beauty of deserts demand a specific photographic eye. These environments often feature dramatic light and expansive vistas.
- Mountains: Focus on leading lines created by ridges, valleys, and rivers. Use wide-angle lenses to emphasize scale and depth. Clouds can add drama; wait for dynamic skies. The Tetons, Glacier National Park, and sections of the Appalachian Trail offer incredible mountain views.
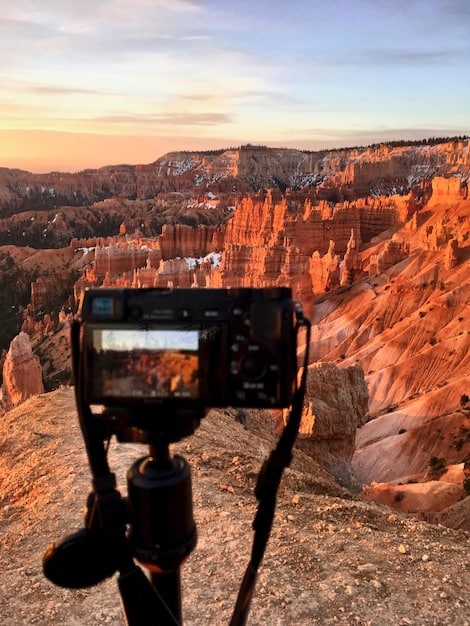
- Deserts: Look for textures in sand dunes or rock formations. The play of light and shadow is crucial here, especially during golden hour to bring out rich, warm tones. Joshua Tree, Death Valley, and the canyons of Utah (Zion, Bryce) are prime desert locations. Silhouettes against vibrant sunsets work exceptionally well in these open environments.
Always consider the foreground in these large landscapes. A well-placed rock, a desert plant, or a patch of wildflowers can provide a crucial anchor point for the viewer’s eye, adding depth and interest to the scene.
Photographing Forests, Coasts, and Water Features
These environments offer a different set of challenges and opportunities. The interplay of light, water, and dense foliage requires a keen eye for detail and patience.
- Forests: Light is often dappled and challenging. Look for shafts of light piercing through the canopy, mist, or fog to create ethereal moods. Use a narrower aperture (higher f-stop) to keep much of the scene in focus, or a wider aperture for selective focus on specific elements. The Pacific Northwest rainforests (Olympic National Park) or the vibrant autumn colors of New England are excellent for forest photography.
- Coasts: Long exposures are your friend here. Use ND filters to smooth out water and create dreamy, ethereal seascapes. Look for interesting rock formations, driftwood, or leading lines in receding waves. Sunset and sunrise provide spectacular colors over the ocean. California’s Big Sur, Oregon Coast, and Acadia National Park in Maine are coastal photography havens.
- Water Features (Rivers, Lakes, Waterfalls): Again, long exposures are key for creating silky-smooth water effects, often best achieved with a tripod and ND filter. Look for reflections in calm lakes, or compose to emphasize the movement and power of a waterfall. Yosemite, Yellowstone, and the Great Lakes offer diverse water photography opportunities.
For all these locations, planning is vital. Research the best times for light, peak seasons for specific phenomena (like fall colors), and any permits required. Being prepared allows you to focus on the creative act of photography rather than logistical hurdles.
Essential Gear You’ll Actually Use: A Focused Kit for Travelers
When embarking on a three-month course to master travel photography in the US, having the right gear is crucial. However, the temptation to overpack or invest in expensive, unnecessary equipment is common among beginners. Our focus is on a lean, efficient kit that offers maximum versatility without weighing you down, allowing you to concentrate on capturing stunning landscapes rather than managing gear. The goal is to make informed choices that support your learning and photographic style, rather than getting caught up in consumerism.
Many professional travel photographers swear by a minimalist approach. The less gear you have to worry about, the more you can immerse yourself in the moment and actively seek out compelling compositions. This section breaks down the truly essential items you’ll want to consider for your kit, emphasizing practicality and performance for landscape photography.
Camera Body and Lenses: The Core of Your Kit
The choice of camera body often comes down to personal preference and budget, but for landscape photography, resolution and dynamic range are key considerations. Lenses, however, are arguably even more important than the body itself.
- Mirrorless or DSLR Camera: Both are excellent choices. Mirrorless cameras are typically lighter and more compact, often preferred by travelers. Look for a camera with manual controls (M, A/Av, S/Tv modes) and the ability to shoot in RAW format.
- Versatile Wide-Angle Lens (16-35mm full-frame equivalent): This is your workhorse for expansive landscapes. It allows you to capture vast scenes, towering mountains, and sweeping coastlines. Look for one with good sharpness across the frame.
- Mid-Range Zoom Lens (24-70mm full-frame equivalent): Extremely versatile for general travel, offering a range from moderate wide-angle to short telephoto. Useful for capturing details within a landscape or for more intimate shots.
- Optional: Telephoto Zoom Lens (70-200mm or 100-400mm): While not strictly essential for all landscapes, a telephoto can be invaluable for compressing distant elements, isolating peaks, or capturing wildlife within a landscape. Consider it if your budget and carrying capacity allow.
When selecting lenses, pay attention to the maximum aperture. While f/2.8 lenses are great for low light, many excellent landscape lenses have maximum apertures of f/4 or variable apertures, as landscape photographers often shoot at f/8 or f/11 for depth of field.
Essential Accessories for Landscape Photography
Beyond the camera and lenses, a few key accessories will significantly enhance your ability to capture high-quality landscape images.
- Sturdy Tripod: Non-negotiable for sharp images, especially in low light or when using narrow apertures and slow shutter speeds. Carbon fiber models are lighter for travel, but aluminum is more affordable. Look for stability and ease of setup.
- Remote Shutter Release (wired or wireless): Prevents camera shake when pressing the shutter button, ensuring maximum sharpness during long exposures.
- Polarizing Filter (CPL): Reduces glare from water and foliage, deepens blue skies, and enhances saturation without affecting colors unnaturally. A must-have for vibrant landscape shots.
- Neutral Density (ND) Filters: These “sunglasses for your lens” allow for longer exposures in bright light, essential for silky water effects in waterfalls, rivers, or seascapes. A variable ND filter or a set of fixed ND filters (e.g., 3-stop, 6-stop, 10-stop) can be very useful.
- Spare Batteries and Memory Cards: You don’t want to run out of power or storage in the middle of an incredible shooting location.
- Lens Cleaning Kit: Dust and smudges can ruin a shot. A blower, lens pen, and microfiber cloth are essential.
- Weather-Resistant Camera Bag: Protects your gear from the elements and organizes everything conveniently. Choose one comfortable for hiking.
Investing wisely in these essential items will prepare you for diverse photographic opportunities across the US. Remember, the best gear is the gear you understand and use effectively.
Creative Techniques for Distinctive Landscape Shots
Beyond the fundamental knowledge of exposure and composition, applying creative techniques can significantly elevate your landscape photography. These methods push you to think differently about a scene and to intentionally craft images that stand out. Mastering these approaches during your three-month course will allow you to move past simply documenting a scene to interpreting it in a personal and compelling way. The US landscapes provide an endless canvas for experimentation, from dramatic long exposures to the intricate dance of star trails.
Many beginners follow established rules, which is excellent for building a foundation. However, true mastery involves knowing when and how to bend or break those rules to create something unique. Creative techniques often require patience, planning, and a willingness to try unconventional angles or settings. They add a layer of sophistication and artistic intent to your work.
Long Exposure Photography: Capturing Motion and Mood
Long exposure is a technique that intentionally blurs moving elements while keeping static elements sharp, creating a sense of ethereal movement and tranquility.
- Silky Water: One of the most popular uses for long exposure in landscapes. Rivers, waterfalls, and oceans can be transformed into smooth, painterly surfaces by using shutter speeds from 1/2 second to several minutes. This often requires ND filters during daylight.
- Streaky Clouds: Similar to water, clouds caught in a long exposure can create dramatic streaks across the sky, adding dynamic movement and interest to an otherwise static scene. Best with a strong breeze and a shutter speed of 30 seconds or longer.
- Ghostly Figures: In bustling scenic spots, very long exposures can make moving people disappear or appear as translucent ghosts, allowing the landscape to take center stage without human distraction.
Experiment with different shutter speeds to achieve varying degrees of blur. A tripod and remote shutter release are absolutely essential for any long exposure work to prevent camera shake.
Panoramic and Astrophotography: Expanding Your Horizons
These techniques allow you to capture scenes that are too vast for a single frame or to reveal the hidden beauty of the night sky.
- Panoramas: Stitching multiple photos together to create an incredibly wide image, perfect for grand vistas that a single wide-angle shot can’t encompass. Technique involves overlapping shots by 30-50% and keeping the camera level.
- Astrophotography (Milky Way, Star Trails): Venture out into dark sky locations (common in US National Parks, far from light pollution) to capture the Milky Way or star trails. This requires wide-angle lenses, fast apertures (e.g., f/2.8), high ISOs (e.g., 3200-6400), and long exposures (15-30 seconds for milky way, much longer for trails).
- Time-Lapse: A sequence of photos taken over time and then played back rapidly, condensing hours of movement (sunrise, clouds, stars) into a short video. This combines many of the technical skills learned throughout the course.
These creative techniques push the boundaries of what a single photograph can convey, enabling you to tell richer, more dynamic stories about the landscapes you encounter. They require practice and patience, but the results can be truly spectacular and distinctive.
Sustaining Your Passion: Beyond the Three-Month Course
Completing a three-month course is a significant achievement, but the journey of mastering travel photography is continuous. The breathtaking US landscapes offer a lifetime of photographic opportunities, and staying engaged with your craft is key to ongoing growth and enjoyment. This final section focuses on how to keep your passion alive, refine your skills further, and contribute to the broader photographic community long after your initial intensive learning period. Photography is not just about the gear or the techniques; it’s about seeing, learning, and sharing your unique perspective with the world.
The best photographers are perpetual students. They continuously experiment, reflect on their work, and learn from others. As you continue to explore the diverse regions of the US, you’ll encounter new challenges and inspirations. Embracing these as learning opportunities will ensure your skills continue to sharpen and your creative vision continues to evolve.
Continued Learning and Skill Refinement
Once the structured course is over, it’s vital to maintain momentum. Photography, like any art form, thrives on consistent practice and a willingness to explore new avenues.
- Regular Practice: Consistency is key. Even short outings with your camera can help keep your skills sharp and open your eyes to new photographic possibilities in your local environment. Don’t wait for a grand landscape trip to shoot.
- Advanced Techniques: Explore more complex concepts like focus stacking for ultimate sharpness, exposure blending for high-dynamic-range scenes, or advanced light painting for creative night shots.
- Post-Processing Mastery: Delve deeper into your chosen editing software. There are always new tools and workflows to learn that can make your editing more efficient and your results more refined.
- Workshops and Tutorials: Attend specialized workshops (online or in-person) or follow advanced tutorials from photographers whose work you admire. Learning from different perspectives can unlock new creative approaches.
Set personal projects or challenges. For instance, dedicate a month to shooting only black and white landscapes, or focus on capturing the same location at different times of day or in various weather conditions. These focused efforts can lead to significant breakthroughs.
Sharing Your Work and Engaging with the Community
Photography is often a solitary pursuit during capture, but sharing your results and engaging with others enriches the entire experience.
- Online Platforms: Share your best work on platforms like Instagram, Flickr, 500px, or specialized photography forums. This exposes your work to a wider audience and provides opportunities for feedback.
- Local Photo Clubs: Join a local photography club. These provide a community of like-minded individuals, opportunities for group outings, critiques, and shared learning.
- Print Your Work: Seeing your photographs in print is a different experience than viewing them on a screen. Create photobooks, print large format images, or feature them in personal galleries. This validates your efforts and allows a tangible appreciation of your art.
- Teach and Mentor: Once you gain confidence, consider sharing your knowledge with new beginners. Teaching is an excellent way to consolidate your own understanding and give back to the community.
Remember that every photograph you take, every landscape you explore, is a step in your unique photographic journey. Embrace the process, continue to learn, and allow the stunning US landscapes to inspire your ever-evolving artistic vision.
| Key Point | Brief Description |
|---|---|
| 📸 Camera Mastery | Understand aperture, shutter speed, and ISO for full manual control in Month 1. |
| 🖼️ Composition & Light | Learn powerful compositional rules and harness natural light during Month 2. |
| ✨ Post-Processing & Story | Refine images and develop your unique storytelling voice in Month 3. |
| 🎒 Essential Gear | Assemble a practical kit with camera, lenses, tripod, and filters for US travels. |
Frequently Asked Questions About Travel Photography
The most crucial skill for a beginner is understanding the exposure triangle (aperture, shutter speed, ISO). Mastering these three elements allows you to move beyond automatic camera settings and gain creative control over your images, adapting to various lighting conditions found in US landscapes.
No, expensive gear is not a prerequisite. A good entry-level DSLR or mirrorless camera with a versatile wide-angle lens, along with a sturdy tripod, provides an excellent foundation. Focus on learning technical and compositional skills; these are far more impactful than the cost of your equipment.
Post-processing is extremely important. It’s where you refine your images, correct imperfections, and enhance colors and details to match your artistic vision. It’s about bringing out the best in what you captured, turning raw files into finished, stunning photographs.
The “golden hour”—shortly after sunrise and before sunset—offers soft, warm, and magical light that’s ideal for landscapes. The “blue hour,” just before sunrise or after sunset, provides a cooler, more serene mood. Avoiding harsh midday sun generally yields better results.
Developing a unique style involves consistent practice, critical self-reflection, and experimentation with creative techniques. Analyze other photographers’ work, but always try to interpret scenes in a way that resonates with your personal vision and emotions. Sharing your work and seeking feedback also aids growth.
Conclusion: Your Path to Stunning US Landscape Photography
This three-month course, “How to Master Travel Photography in 3 Months: A Beginner’s Course for Stunning US Landscapes,” is designed to equip you with the essential knowledge and practical skills to capture the diverse beauty of America. From understanding your camera’s core functions and mastering compositional rules to refining your images through post-processing and exploring creative techniques, each step builds upon the last. Remember that photography is an ongoing journey of learning and discovery. By consistently applying these principles, venturing into iconic US landscapes, and nurturing your passion, you will not only create breathtaking images but also develop a unique artistic voice that tells compelling visual stories of your travels. Embrace the adventure, and let your lens capture the awe-inspiring grandeur that surrounds you.


")


