Master Travel Photography in 3 Months: US Landscapes Course
This beginner’s course outlines how to master travel photography in 3 months: a beginner’s course for stunning US landscapes, focusing on essential techniques, equipment selection, and practical application to capture breathtaking images across the United States. It provides a structured learning path with weekly assignments and expert tips to transform novice photographers into skilled landscape artists.
Embark on an exhilarating journey to master travel photography in 3 months: a beginner’s course for stunning US landscapes, transforming your passion for exploration into breathtaking visual stories. This comprehensive guide is designed to equip aspiring photographers with the essential skills, technical knowledge, and creative vision needed to capture the diverse and majestic beauty of the United States. From rugged mountains to serene coastlines, prepare to elevate your photographic craft and create images that truly resonate.
The Foundation: Your First Month of Photography Mastery
The initial month of our three-month immersive program focuses on building a solid foundation in the core principles of photography. This isn’t just about understanding camera settings; it’s about developing an eye for light, composition, and storytelling. We start by demystifying photographic jargon, ensuring you grasp the “why” behind each technique before moving on to the “how.” This phase is crucial for any beginner aiming to capture compelling images rather than just snapshots.
Many aspiring travel photographers often feel overwhelmed by the sheer volume of information available. Our structured approach breaks down complex topics into digestible weekly modules, each designed to progressively enhance your understanding and practical skills. You’ll learn that mastering the basics is the fastest route to creative freedom, allowing you to react instinctively to changing light and dynamic landscapes.
Understanding Your Camera: Beyond Auto Mode
Stepping away from automatic settings is the first significant leap for any budding photographer. This section dives deep into the exposure triangle: aperture, shutter speed, and ISO. Understanding how these three elements interact is fundamental to controlling the light and look of your images. Moving from auto to manual mode unlocks incredible creative potential, providing control over depth of field, motion blur, and image brightness.
We’ll cover the practical implications of each setting. For instance, a wide aperture is perfect for isolating a subject against a blurred background, ideal for close-up landscape elements. Conversely, a narrow aperture ensures everything from foreground to background is sharp, essential for grand scenic views. Similarly, shutter speed can freeze fast-moving water or create silky smooth long exposures, while ISO manages sensitivity to light, a critical factor in low-light conditions.
- Aperture (f-stop): Controls depth of field and light entering the lens.
- Shutter Speed: Dictates how long the sensor is exposed to light and affects motion.
- ISO: Determines the camera sensor’s sensitivity to light, impacting noise levels.
- White Balance: Adjusts color temperature to accurately represent scene colors.
Compositional Excellence: Framing Stunning US Landscapes
Composition is the art of arranging elements within your frame to create a visually appealing and impactful image. It’s what separates a good photograph from a great one. This month introduces you to classic compositional rules, offering guidelines that help train your eye, but also encourages you to break them creatively. The goal is to lead the viewer’s eye through your photograph, creating a sense of depth and narrative.
From the rule of thirds to leading lines and natural frames, these techniques provide a roadmap for structuring your shots effectively. We’ll explore how negative space can enhance a subject, and how symmetry or asymmetry can create balance or tension. Understanding these elements in the context of vast landscapes allows you to transform an ordinary scene into an extraordinary photograph.
By the end of the first month, you’ll not only be comfortable with your camera’s manual settings but will also possess a heightened awareness of how to compose a scene. Practical assignments will challenge you to apply these concepts in diverse environments, setting the stage for more advanced techniques in the following months.
Month Two: Advanced Techniques and Gear Optimization
Having established a strong understanding of fundamental photography principles, our second month shifts focus to advanced techniques and optimizing your gear. This stage is about refining your eye and expanding your technical toolbox to tackle more challenging shooting scenarios typical of diverse US landscapes. We delve into specific methods that truly elevate your photographs from good to stunning, ensuring you’re prepared for any photographic opportunity.
Many intermediate photographers find themselves plateauing at this stage, unsure how to push their work further. This module is designed to bridge that gap, providing clear, actionable strategies. You’ll learn not just what to do, but why specific techniques are effective in different contexts, fostering a deeper understanding that goes beyond rote memorization of settings.
Harnessing Light: The Photographer’s Greatest Tool
Light is the essence of photography, and mastering its use is paramount for impactful travel images. This section will teach you to observe, anticipate, and react to different types of light. From the golden hour’s magical glow to the dramatic contrasts of midday sun, understanding how light interacts with your subject is key to creating mood and depth. You’ll learn to identify the best times of day for different scenes and how to use natural light to your advantage.
Beyond natural light, we’ll discuss the subtle art of using reflectors and diffusers, even simple ones, to modify light in a landscape setting. This doesn’t mean carrying a studio setup; it means understanding how to strategically position yourself relative to the sun or a reflective surface. The goal is to make every photon work in your favor, enhancing textures, colors, and overall visual appeal.
- Golden Hour: Soft, warm light ideal for dramatic shadows and rich colors.
- Blue Hour: Deep, cool tones perfect for cityscapes and nocturnal landscapes.
- Overcast Days: Diffused light that minimizes harsh shadows and provides even illumination.
- Backlighting: Creates silhouettes and dramatic rim lighting for creative effects.
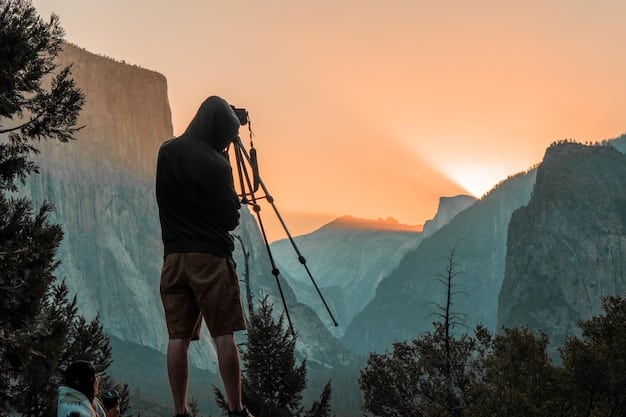
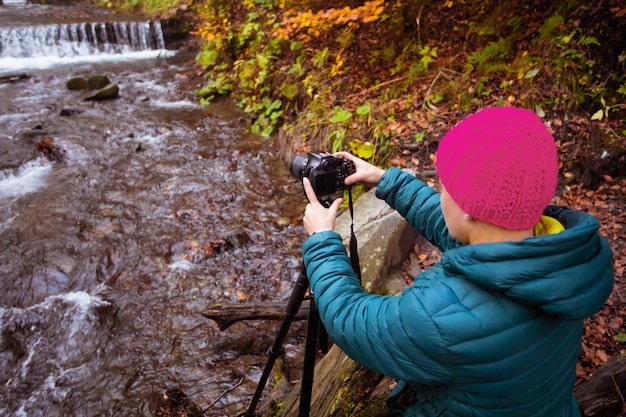
Gear Optimization and Essential Accessories
While gear doesn’t make the photographer, the right tools can certainly enable greater creative expression. This module guides you through selecting and utilizing essential accessories that enhance your landscape photography. We’ll move beyond the camera body and lens to explore the critical role of tripods, filters, and other indispensable items. Making informed decisions about your kit ensures you’re prepared without being overburdened.
For landscape photography, a sturdy tripod is non-negotiable for sharp images, especially in low light or when using longer exposures. Filters, such as polarizers and neutral density (ND) filters, become vital tools for managing reflections, enhancing colors, and enabling creative effects like silky smooth water. We’ll also cover backpack selection, battery management, and protective measures for your equipment in various outdoor conditions.
Using Filters for Dramatic Effect
Filters are powerful accessories that allow photographers to manipulate light and color before the image is even captured. A polarizer, for instance, can reduce glare from water and foliage, saturating colors and enhancing contrast. ND filters are essential for long exposure photography, allowing you to lengthen your shutter speed significantly, even in bright conditions, to create ethereal effects with moving elements like clouds or water.
Graduated neutral density (GND) filters help balance exposures between a bright sky and a darker foreground, preventing blown-out highlights or underexposed shadows. Understanding when and how to use each type of filter will dramatically improve the quality and impact of your landscape photographs, reducing the need for extensive post-processing and capturing more dynamic range in-camera.
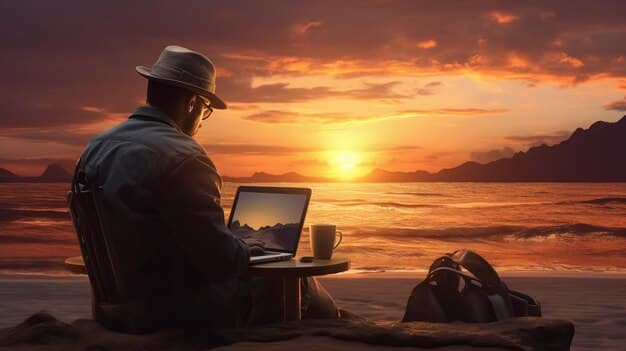
Month Three: Post-Processing, Storytelling, and Practice
The final month of this intensive course brings together all the skills learned, focusing on post-processing techniques, developing a unique photographic voice, and continuous practice. This is where your raw captures are transformed into polished works of art, ready to share with the world. Post-processing is not about fundamentally altering an image, but rather enhancing what was already captured, bringing out its full potential and conveying your artistic vision.
Many beginners view post-processing as an afterthought, but it’s an integral part of the modern photographic workflow. Our goal in this month is to equip you with the knowledge and tools to edit your US landscape photographs skillfully, ensuring they align with the story you want to tell and possess a professional finish. This holistic approach ensures your journey from capture to final image is seamless and impactful.
The Art of Post-Processing: Bringing Images to Life
Post-processing is where the final touches are applied to your photographs, enhancing their visual impact and correcting any minor imperfections. We’ll introduce you to industry-standard software like Adobe Lightroom and Photoshop, focusing on a workflow that is efficient and effective for landscape photography. Learning to use these tools responsibly is key; the aim is to reveal the beauty of the scene, not create something entirely artificial.
Key post-processing steps include adjusting exposure, contrast, and white balance to perfect the image’s overall look. You’ll learn about dodging and burning to selectively lighten or darken areas, enhancing dimensionality. Color grading techniques will be explored to establish mood, while sharpening and noise reduction will refine image detail and clarity. We emphasize a non-destructive editing workflow, allowing for flexibility and experimentation.
- Exposure Adjustments: Fine-tuning brightness and contrast.
- Color Correction: Achieving accurate and pleasing color renditions.
- Sharpening and Noise Reduction: Enhancing detail and removing digital grain.
- Local Adjustments: Applying edits to specific areas of the image.
Developing Your Photographic Voice and Storytelling
Beyond technical proficiency, a truly memorable photograph tells a story and reflects the photographer’s unique perspective. This module encourages you to go beyond simply documenting a scene and instead to interpret it through your lens. Developing your photographic voice involves making deliberate choices about composition, light, and editing that are consistent with your personal style and message.
We’ll discuss how a series of photographs can create a more comprehensive narrative than a single image, especially when capturing the grandeur of US landscapes. Consider how different elements, such as weather, seasons, and human interaction, can contribute to the story. This involves thoughtful planning, observation, and a willingness to experiment. Your unique perspective is what will make your travel photography stand out in a crowded visual world.
Continuous Practice and Feedback
Learning photography is an ongoing journey, and consistent practice is the most effective way to improve. Throughout this three-month course, we integrate weekly assignments and encourage peer feedback, creating a supportive learning environment. The focus in the final month is to solidify these habits, establishing a routine of shooting, reviewing, and refining your work.
We’ll provide guidelines for self-critique and suggest ways to seek constructive feedback from others. Understanding your strengths and areas for improvement is crucial for growth. This continuous cycle of practice, evaluation, and adjustment is what truly leads to mastery, ensuring that the skills you’ve gained are not just retained but continually enhanced as you explore more of the US and beyond.
By the conclusion of this course, you will not only have mastered the technical aspects of travel photography but also cultivated a keen artistic eye and a robust post-processing workflow. You’ll be ready to embark on your next adventure, confident in your ability to capture stunning US landscapes and tell compelling visual stories that reflect your unique vision and expertise.
| Key Point | Brief Description |
|---|---|
| 📸 Camera Fundamentals | Master the exposure triangle (aperture, shutter speed, ISO) and white balance for full creative control. |
| 🏞️ Composition & Light | Learn compositional rules and how to use natural light effectively for dynamic landscape shots. |
| 🛠️ Gear & Filters | Optimize your equipment with essential accessories like tripods and various filters for stunning effects. |
| 🖌️ Post-Processing | Develop a professional workflow using editing software to enhance and finalize your landscape images. |
Frequently Asked Questions About Travel Photography
While all settings are crucial, aperture is arguably the most critical for landscape photography. A smaller aperture (larger f-number, e.g., f/11 or f/16) generally ensures a greater depth of field, keeping both foreground and background elements sharp. This is essential for capturing the expansive detail of US landscapes, though creative choices may warrant wider apertures.
No, not necessarily. While professional-grade equipment can offer advantages, a solid understanding of composition, light, and editing techniques is far more impactful than the cost of your camera. Many modern entry-level DSLRs or mirrorless cameras, along with even advanced smartphones, are capable of producing incredible results with the right skills.
Post-processing is a highly important and integral part of modern travel photography. It allows you to refine exposure, colors, and contrast, correct minor imperfections, and bring out the full potential of your images. It’s often where the photographer’s personal vision truly comes to life, turning a good capture into an exceptional one.
The “golden hour” – shortly after sunrise and before sunset – typically offers the most dramatic and flattering light for landscapes. This soft, warm light creates long shadows and rich colors. The “blue hour,” just before sunrise or after sunset, also offers unique opportunities for moody and atmospheric shots, especially for cityscapes or twilight scenes.
Beyond your camera and a versatile lens, a sturdy tripod is indispensable for sharp landscape shots and long exposures. Essential filters include a circular polarizer to reduce glare and enhance colors, and neutral density (ND) filters for slowing down shutter speeds in bright conditions. Extra batteries and a reliable camera bag are also crucial for travel.
Conclusion: Your Journey to Becoming a Landscape Photography Master
The three-month journey to master travel photography for stunning US landscapes is an investment in both skill and personal growth. By diligently engaging with the fundamental principles, advanced techniques, and the art of post-processing, you’ve equipped yourself with a robust toolkit to capture the world’s beauty with confidence and creativity. Remember that photography is a continuous learning process, where every landscape offers a new lesson and every click of the shutter refines your unique artistic voice. Embrace the adventure, trust your evolving eye, and continue to explore the endless possibilities that travel photography presents. The breathtaking vistas of the United States, and indeed the world, await your lens and your inspired vision.


